




LATEST ARTICLES

Fresh and Fabulous: 15 Spring Bathroom Makeover Inspirations for 2026

If you’re itching to breathe new life into your bathroom but don’t know where to start, you’ve come to the right place. We’ve got a treasure trove of ideas that’ll make your bathroom the talk of the town (or at least your household). From warm wood vibes to high-tech gadgets that’ll make you feel like you’re living in the future, we’ve got something for every taste and budget.

Ah, spring! The season of renewal, fresh starts, and… bathroom makeovers? You betcha! As the world outside bursts into bloom, there’s no better time to give your bathroom a little TLC. After all, it’s where you start and end each day – shouldn’t it be a space that makes you feel fabulous?

So, grab your favorite beverage, get comfy, and let’s embark on a journey through the wonderful world of bathroom design. Trust me, by the time we’re done, you’ll be champing at the bit to start your own spring bathroom makeover!

What You’ll Learn

  • The hottest bathroom trends for spring 2024
  • 15 fresh and fabulous makeover inspirations
  • Practical tips for a successful bathroom renovation
  • How to blend style with functionality in your bathroom design
  • Budget-friendly ideas to transform your space

Ready to turn your bathroom from blah to beautiful? This article is your ticket to a spa-like oasis right in your own home. We’ll walk you through each inspiring idea, sprinkle in some practical advice, and even tackle those burning questions you didn’t even know you had. So, let’s roll up our sleeves and get ready to make some bathroom magic!

Trends Overview: What’s Hot in Bathroom Design for 2024

Before we jump into our 15 fabulous makeover inspirations, let’s take a quick peek at what’s making waves in the world of bathroom design this year. Trust me, these trends are hotter than a steamy shower on a cold morning!

Fresh and Fabulous Makeover Inspirations

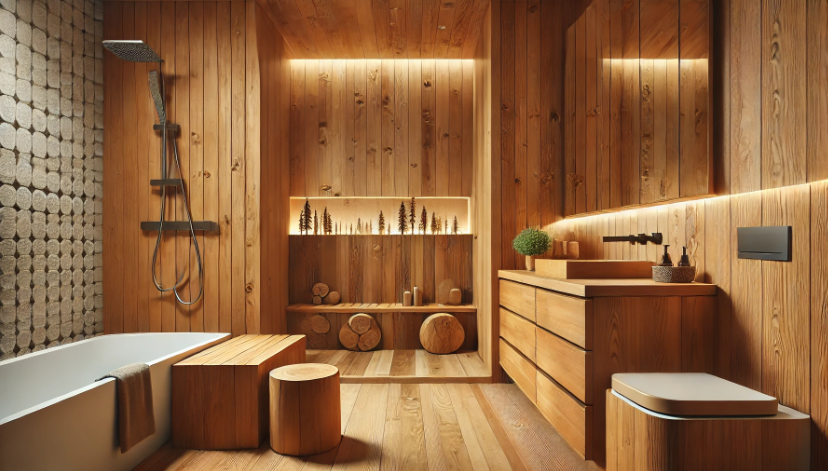
1. Warm Wood Cabinetry: Bringing Nature Indoors
a modern bathroom featuring warm wood cabinetry

Who says bathrooms have to be all cold tiles and stark white surfaces? Not us! Warm wood cabinetry is making a major comeback, and boy, does it look good. Picture this: rich, honey-toned oak vanities, sleek teak shower benches, or even a cedar accent wall. It’s like bringing a piece of a luxury spa right into your home.

But it’s not just about looks (though let’s be honest, it looks amazing). Wood adds a sense of warmth and coziness to your bathroom that’s hard to beat. It’s perfect for creating that calming, zen-like atmosphere we all crave in our personal spaces.

Pro tip: If you’re worried about moisture, opt for water-resistant woods like teak or cedar. And don’t forget to seal that wood properly – you want it looking gorgeous for years to come!

2. Bold Marble Countertops and Tiles: Luxury at Your Fingertips

 Marble bathroom Countertops and Tiles

Marble, oh marble! It’s the Beyoncé of bathroom materials – timeless, gorgeous, and always stealing the show. In 2024, we’re seeing a shift towards bolder marble patterns. We’re talking dramatic veining, unexpected colors, and statement-making book-matched slabs.

Imagine stepping into your bathroom and being greeted by a stunning green marble countertop with gold veining. Or how about a shower enclosure decked out in head-to-toe grey marble with striking white streaks? It’s enough to make you want to linger in the bathroom all day (but maybe don’t do that if you share it with others, yeah?).

Remember, a little marble can go a long way. If a full marble makeover isn’t in the cards, consider a marble accent wall or even just some marble accessories. It’ll add that touch of luxury without breaking the bank.

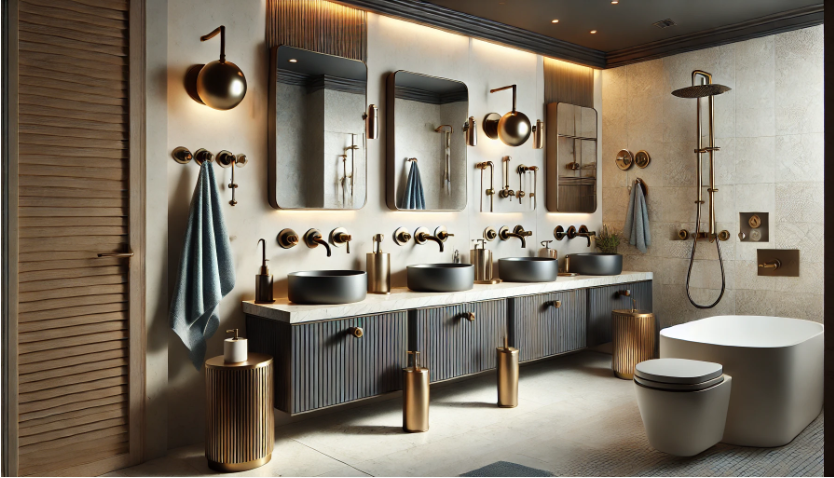
3. Mixed Metal Finishes: Breaking the Matchy-Matchy Rule
bathroom Mixed Metal Finishes

Gone are the days when all your bathroom fixtures had to match perfectly. In 2024, it’s all about that mix-and-match life! Mixing metal finishes adds depth, interest, and a touch of unexpected elegance to your bathroom.

Here’s the secret sauce: stick to 2-3 different finishes max. Any more than that and your bathroom might start looking like a hardware store showroom (unless that’s the vibe you’re going for, in which case, you do you!).

Some winning combinations to try:

  • Brass and matte black
  • Chrome and gold
  • Copper and brushed nickel

Just remember to distribute your chosen finishes evenly throughout the space. Maybe a brass faucet paired with black cabinet handles and a large round mirror with a gold frame. Voila! You’ve just created a bathroom that looks like it was designed by a pro.

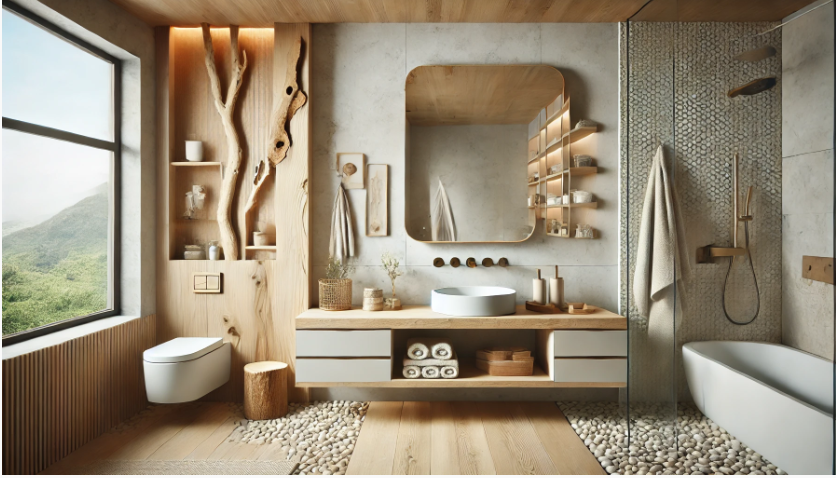
4. Organic Modern Spaces: The Best of Both Worlds
organic modern space bathroom

Organic modern design is like the cool, laid-back cousin of minimalism. It combines the clean lines and simplicity of modern design with the warmth and texture of natural elements. The result? A bathroom that feels both contemporary and cozy.

To nail this look, start with a neutral base – think whites, beiges, and greys. Then, bring in natural wood elements like a floating vanity or some wooden shelves. Add in some unique, nature-inspired touches like a live-edge mirror or a pebble-floored shower.

Don’t forget about greenery! A few well-placed plants can really bring an organic modern bathroom to life. Just make sure to choose varieties that can handle the humidity. A pothos or a peace lily would be right at home in your new organic oasis.

5. Arched and Curved Mirrors: Softening the Edges
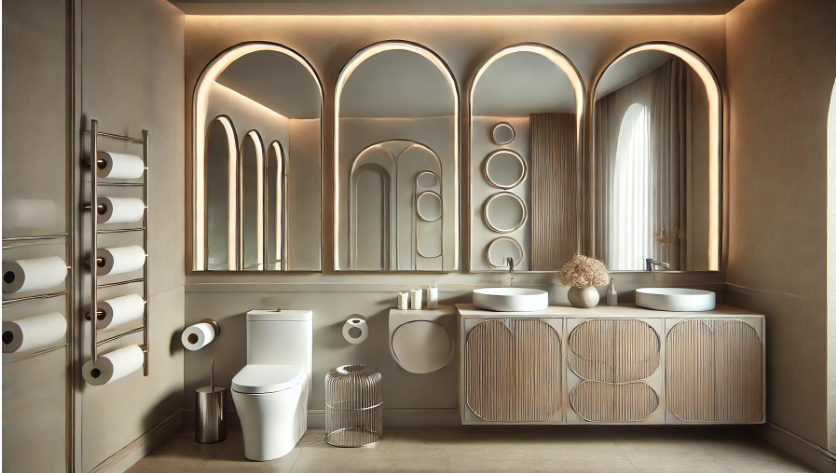
oversized arched mirror that spans the length of your double vanity

Say goodbye to boring rectangular mirrors! In 2024, it’s all about curves, baby. Arched and curved mirrors are taking center stage, adding a soft, elegant touch to bathroom designs everywhere.

An arched mirror can completely transform the look of your vanity area. It adds visual interest and can even make your space feel taller. Plus, it’s a great way to break up all those straight lines typically found in bathrooms.

For a real wow factor, consider an oversized arched mirror that spans the length of your double vanity. Or, for a more subtle approach, try a set of smaller round mirrors arranged in a pleasing pattern. Either way, you’ll be adding a touch of contemporary chic to your space.

6. Statement Lighting: Illuminating in Style
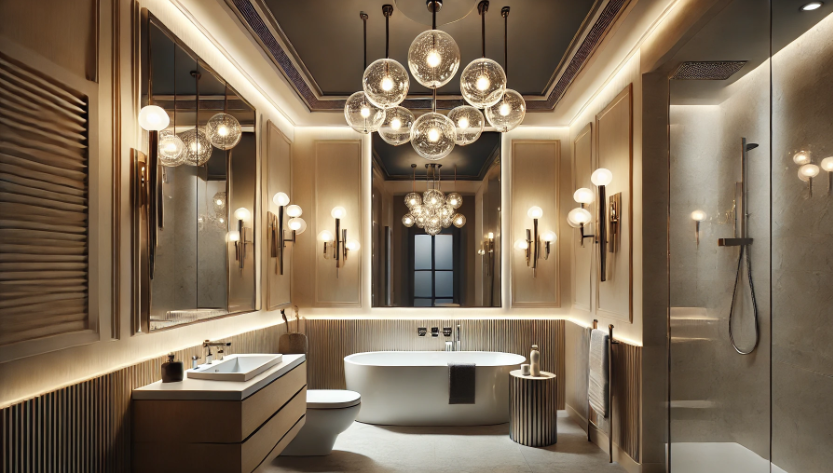
Statement Lighting - Illuminating in Style

Let’s shed some light on one of the most overlooked aspects of bathroom design – lighting! In 2024, bathroom lighting is stepping out of the shadows and into the spotlight (pun totally intended).

Gone are the days of settling for a sad little light bar above your mirror. Now, it’s all about making a statement. Think chandelier over the bathtub, pendant lights flanking your vanity mirror, or even a jaw-dropping ceiling fixture that’ll make you go “Wow!” every time you flip the switch.

But here’s the kicker – your statement lighting doesn’t have to be all glitz and glam. A sleek, modern sconce or a set of minimalist globe lights can be just as impactful. The key is to choose something that complements your overall design while still drawing the eye.

Pro tip: Don’t forget about task lighting! While that crystal chandelier might look amazing, it probably won’t help you much when you’re trying to apply mascara. Layer your lighting with a mix of ambient, task, and accent lights for a well-lit and stylish space.

7. High-Tech Features: Welcome to the Future

 modern bathroom filled with high-tech features.

Buckle up, folks – we’re about to take your bathroom into the 21st century! High-tech features are making a splash in 2024, and trust me, once you try them, you’ll wonder how you ever lived without them.

Let’s start with the shower. Imagine stepping into a shower that knows exactly how hot you like your water and automatically adjusts to your preferred temperature. Or how about a smart shower system that lets you control water flow, temperature, and even music with voice commands? It’s like having your own personal shower DJ!

But the tech doesn’t stop there. We’re seeing:

  • Smart toilets with heated seats, built-in bidets, and automatic flushing
  • Mirrors with built-in LED lighting and Bluetooth speakers
  • Touchless faucets that not only look cool but help save water too
  • Digital shower controls that let you preset your perfect shower experience

And for the ultimate luxury? How about a TV embedded in your bathroom mirror? Perfect for catching up on your favorite shows while you get ready in the morning (just don’t blame me if you end up running late!).

8. Bold Tile Patterns: Making a Splash

2024 is the year to let your personality shine through in your bathroom, and what better way to do that than with some show-stopping tile patterns? We’re talking bold geometrics, eye-catching mosaics, and playful patterns that’ll make your bathroom anything but boring.

One trend we’re loving is the return of the classic checkerboard pattern, but with a twist. Instead of the traditional black and white, try unexpected color combinations like navy and cream, or even a mix of different marble tiles for a luxe look.

Hexagon tiles are also having a moment, especially when used to create an ombre effect up the wall. Start with darker tiles at the bottom, gradually fading to lighter shades as you move up. It’s like a work of art right in your bathroom!

And let’s not forget about good old subway tiles. They’re still going strong, but with a fresh update. Think colorful subway tiles laid in a herringbone pattern, or even mixing different sizes and colors for a truly unique look.

Remember, when it comes to bold tile patterns, a little can go a long way. Consider using your statement tiles on just one accent wall or as a feature strip in your shower. It’ll create a focal point without overwhelming the space.

9. Double Vanities: Twice the Fun
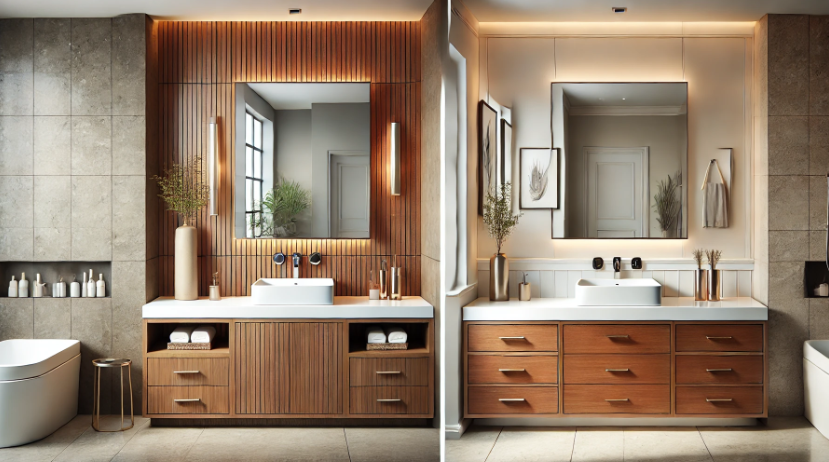
double vanities

If you share your bathroom with a partner (or a particularly high-maintenance roommate), you’re going to love this next trend. Double vanities are big news in 2024, and for good reason. They’re practical, they look great, and they might just save your relationship (kidding… sort of).

The beauty of double vanities is that they give each person their own dedicated space. No more fighting over who left the toothpaste uncapped or whose hair is clogging up the sink. Plus, with two sinks, you can both get ready at the same time – hello, extra minutes in bed!

But double vanities aren’t just about function. They can be a stunning design feature too. Try a long, floating vanity in a warm wood tone, topped with a sleek white countertop and two vessel sinks. Or go for a more traditional look with a double vanity in a painted finish, complete with plenty of storage and matching framed mirrors above.

And here’s a hot tip: if you’re short on space but still want that double vanity feel, consider a trough sink with two faucets. It gives you the functionality of a double vanity without taking up as much room. Clever, right?

10. Natural Elements: Bringing the Outdoors Indoors
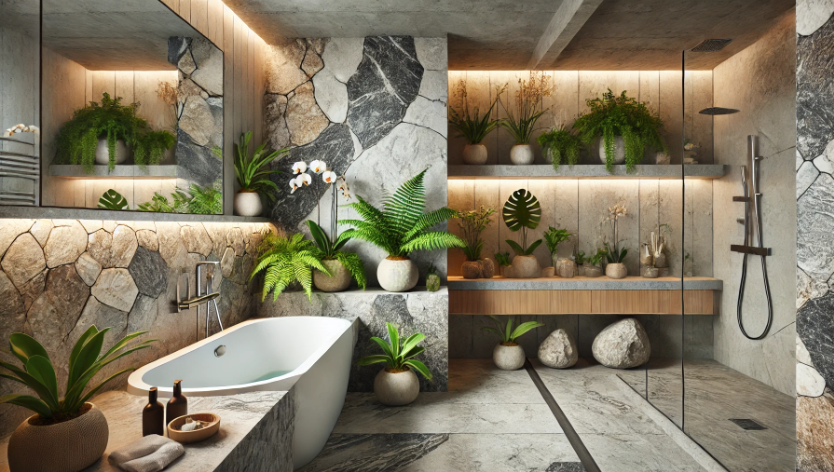
modern bathroom design featuring natural elements with a focus on incorporating stones

In 2024, we’re seeing a huge trend towards incorporating natural elements into bathroom design. It’s all about creating a calm, spa-like atmosphere that helps you feel connected to nature – even when you’re just brushing your teeth.

Stone is having a major moment. We’re seeing it used in everything from countertops and shower walls to freestanding bathtubs. Rough, unpolished stone adds texture and interest, while polished stone brings a touch of luxury.

But stone isn’t the only natural material making waves. Consider adding:

  • A wooden bath mat or shower floor insert for a touch of warmth underfoot
  • Rattan or woven baskets for stylish storage
  • A living wall of plants to purify the air and add a pop of green
  • A pebble-floored shower for a massage-like experience every time you wash

The key to nailing this trend is to mix and match your natural elements. Pair rough stone with smooth wood, or sleek marble with textured rattan. It’s all about creating a balance that feels organic and inviting.

11. Stand-Alone Tubs: Soak in Style
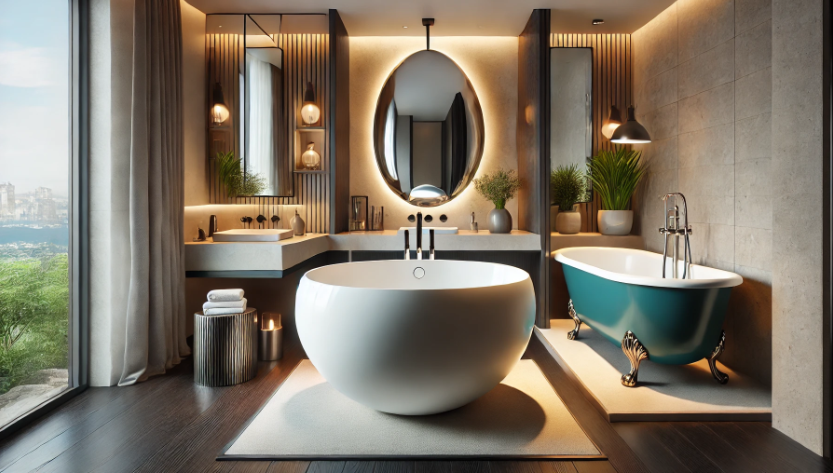
 a luxurious modern bathroom featuring stand-alone tubs

If you’ve ever dreamed of having your own personal spa retreat, this trend is for you. Stand-alone tubs are making a huge splash (pun intended) in 2024, and they’re the perfect way to add a touch of luxury to your bathroom makeover.

Gone are the days when bathtubs were just functional fixtures tucked away in the corner. Now, they’re taking center stage as stunning focal points. Picture a sleek, egg-shaped tub sitting pretty in the middle of your bathroom. Or how about a classic clawfoot tub painted in a bold color? Talk about a conversation starter!

But here’s the thing – stand-alone tubs aren’t just about looks. They’re all about creating an experience. Imagine sinking into a deep, warm bath after a long day, perhaps with a glass of wine and your favorite book. It’s like a mini-vacation right in your own home!

Pro tip: If you’re tight on space, don’t worry! There are plenty of compact stand-alone tubs designed for smaller bathrooms. And remember, a tub doesn’t have to be huge to make a big impact.

12. Earth-Toned Color Schemes: Grounded in Style
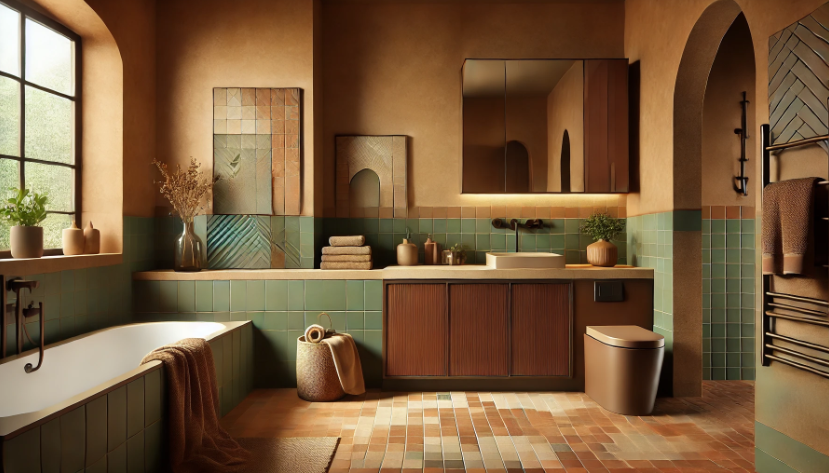
bathroom featuring a warm, earthy color scheme

In 2024, we’re seeing a move away from the cool greys and stark whites that have dominated bathroom design in recent years. Instead, warm, earthy tones are taking center stage, creating spaces that feel cozy, inviting, and oh-so-stylish.

Think rich terracottas, warm beiges, soft sage greens, and deep, chocolatey browns. These colors not only look great, but they also have a calming effect, perfect for creating a relaxing bathroom atmosphere.

Here are some earthy color combos to consider:

  • Terracotta and cream for a warm, Mediterranean vibe
  • Sage green and taupe for a nature-inspired look
  • Chocolate brown and mustard yellow for a bold, retro feel

Remember, you don’t have to paint your entire bathroom in these colors (unless you want to, of course!). Even small touches, like earthy-toned towels, a terracotta plant pot, or a warm wood vanity can help bring this trend to life.

13. Custom Shower Niches: Stylish Storage Solutions
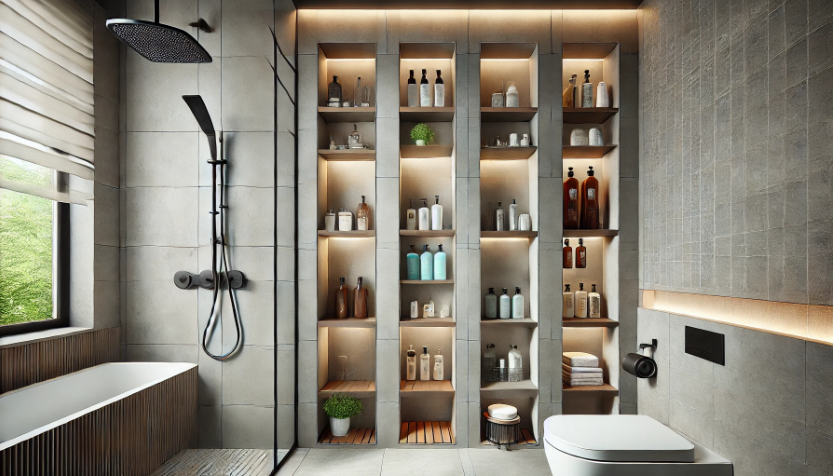
: Stylish Storage Solutions

Let’s face it – we all have way too many shower products. Shampoos, conditioners, body washes, face scrubs… the list goes on. But in 2024, we’re saying goodbye to cluttered shower caddies and hello to sleek, custom shower niches.

A shower niche is essentially a recessed shelf built right into your shower wall. It’s a game-changer when it comes to bathroom organization, giving you a dedicated spot for all your shower essentials without taking up any extra space.

But here’s where it gets fun – in 2024, we’re seeing shower niches become design features in their own right. Some cool ideas to try:

  • A long, vertical niche that runs the full height of your shower
  • Multiple small niches in different shapes (circles, squares, triangles) for a playful look
  • A niche lined with contrasting tile to create a bold accent

And hey, why stop at one? Multiple niches at different heights can accommodate everyone in the family, from the tallest to the smallest.

14. Curbless Showers: Seamless and Chic
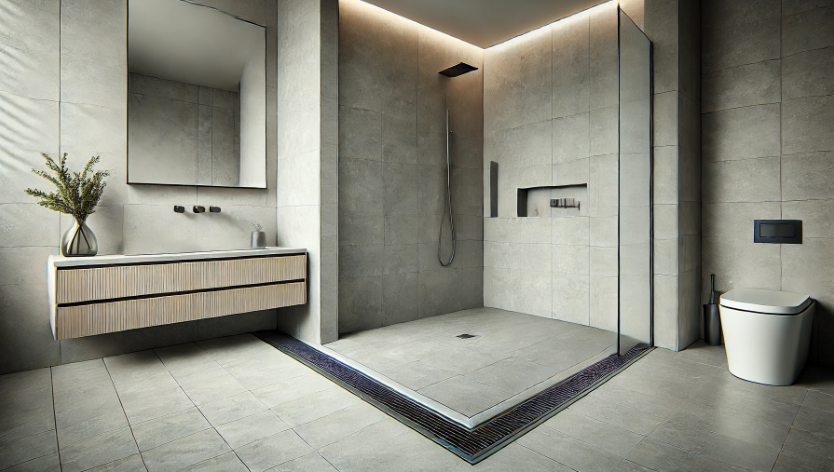
 Curbless showers

Say goodbye to those pesky shower curbs! Curbless showers are taking the bathroom world by storm in 2024, and for good reason. They’re sleek, they’re modern, and they create a seamless look that can make your bathroom feel bigger and more luxurious.

A curbless shower is exactly what it sounds like – a shower without a raised threshold. The floor of the shower is level with the rest of the bathroom floor, creating a smooth, continuous surface. It’s not just about looks, though. Curbless showers are also great for accessibility, making it easier for people with mobility issues to use the shower safely.

To really nail this trend, consider extending your floor tile right into the shower area. It creates a cohesive look that can make your bathroom feel much larger than it actually is. And don’t forget about drainage – a linear drain along the edge of the shower area can be both functional and stylish.

15. Wallpaper Accents: Making a Statement
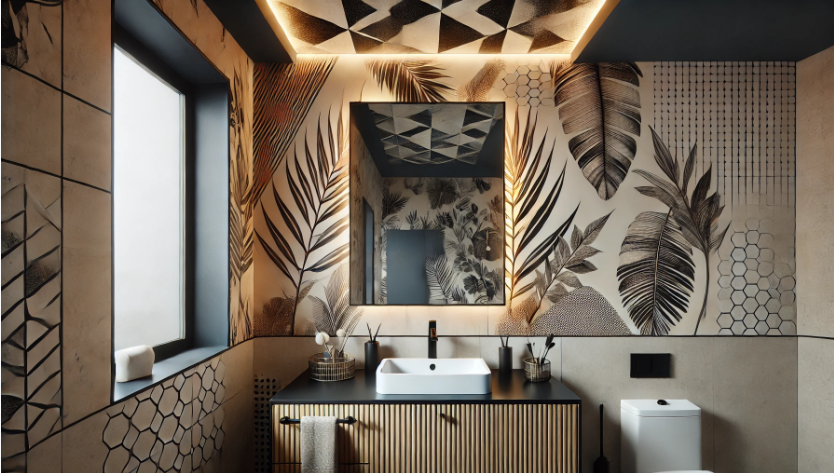
Wallpaper Accents

I know what you’re thinking – wallpaper? In the bathroom? Trust me, it’s not your grandma’s floral patterns we’re talking about here. In 2024, bathroom wallpaper is all about making a bold statement and adding personality to your space.

We’re seeing everything from tropical leaf prints to geometric patterns to moody, artistic designs. The key is to use wallpaper strategically. A feature wall behind your vanity can create a stunning backdrop for your mirror and lighting. Or how about wallpapering the ceiling for an unexpected pop of pattern overhead?

If you’re worried about moisture, fear not! There are plenty of waterproof and water-resistant wallpapers designed specifically for bathroom use. Just make sure to properly prep your walls and use the right adhesive.

And here’s a hot tip: if you’re not ready to commit to full-on wallpaper, try a wallpaper mural. It’s like a giant piece of art for your bathroom wall, and it can be a great way to dip your toe into the world of bathroom wallpaper.

Remember, when it comes to wallpaper, less is often more. A little pattern can go a long way in a small space like a bathroom. But hey, if you want to go all out with floor-to-ceiling pattern, who am I to stop you? It’s your bathroom, after all!

Practical Tips for a Successful Spring Bathroom Makeover

Set Your Budget: Dollars and Sense

Alright, let’s talk money, honey! Before you start tearing out tiles and ordering that fancy Japanese toilet, it’s crucial to set a realistic budget. Trust me, nothing puts a damper on a bathroom makeover faster than running out of cash halfway through.

First things first, take a good hard look at your finances. How much can you comfortably spend without eating ramen for the next year? Once you’ve got a number in mind, here’s a pro tip: add a 20% buffer. Renovations have a sneaky way of costing more than you expect, and that buffer could be a real lifesaver.

Here’s a handy table to help you break down your budget:

ItemPercentage of Budget
Labor40-50%
Cabinetry and Countertops15-20%
Fixtures (toilet, tub, shower)10-15%
Flooring7-10%
Lighting and Electrical5-7%
Paint and Decor3-5%
Miscellaneous/Contingency10-15%

Remember, you don’t have to blow your entire budget on high-end everything. Maybe splurge on that dreamy rainfall showerhead, but save on more budget-friendly floor tiles. It’s all about balance, baby!

Hire Professionals vs. DIY: To Pro or Not to Pro?

Ah, the eternal question: should you DIY your bathroom makeover or call in the pros? Well, it depends on a few factors:

  1. Your skill level: Be honest with yourself. If your DIY experience doesn’t go beyond hanging a picture frame, tackling a full bathroom reno might be biting off more than you can chew.
  2. The scope of the project: Replacing a vanity? You might be able to handle that. Rerouting plumbing or electrical? That’s probably best left to the experts.
  3. Your time: DIY can save money, but it’ll cost you in time. Are you prepared for your bathroom to be out of commission for weeks or even months?
  4. Your budget: Professional help will increase your costs, but it could save you from costly mistakes in the long run.

If you do decide to go the DIY route, know your limits. It’s okay to tackle some parts yourself and leave the trickier bits to the pros. And for the love of all that is holy, don’t mess with electrical work unless you really know what you’re doing. A shocking experience in the bathroom is not the kind of makeover we’re going for!

Plan Layout and Functionality: Form Meets Function

When it comes to bathroom design, layout is king. A well-planned layout can make even the tiniest bathroom feel spacious and functional. Here are some things to consider:

  1. Traffic flow: Can you move easily around the space? Is there enough room to open cabinet doors and drawers?
  2. Plumbing locations: Moving plumbing can be expensive. Can you work with the existing layout?
  3. Lighting: Think about task lighting for the vanity, ambient lighting for overall illumination, and maybe even some accent lighting to highlight design features.
  4. Storage: Where will you keep all your stuff? Consider built-in storage solutions to maximize space.
  5. Ventilation: Proper ventilation is crucial in a bathroom. Make sure you have a good exhaust fan to prevent moisture build-up.

Remember, functionality doesn’t have to mean boring. You can have a bathroom that looks amazing and works perfectly for your needs. It’s all about finding that sweet spot between form and function.

Material and Finish Selection: Choose Wisely

Choosing materials for your bathroom makeover is like being a kid in a candy store – so many options, so little time! But before you get carried away with that gorgeous marble tile, consider these factors:

  1. Durability: Bathrooms take a beating. Choose materials that can stand up to moisture, heat, and daily use.
  2. Maintenance: How much time are you willing to spend cleaning and maintaining your bathroom? Some materials require more TLC than others.
  3. Style longevity: That trendy tile might look great now, but will you still love it in five years? Consider timeless materials that won’t date quickly.
  4. Budget: Remember that budget we talked about earlier? Make sure your material choices align with what you can afford.

Here’s a handy comparison table of popular bathroom materials:

MaterialProsConsMaintenanceCost
Porcelain TileDurable, water-resistant, variety of stylesCan be cold, grout needs sealingLow$$
Natural StoneLuxurious look, unique patternsPorous, needs sealing, can be slipperyHigh$$$$
Luxury VinylWater-resistant, affordable, easy to installMay not increase home value as muchLow$
QuartzNon-porous, durable, low maintenanceLimited color options, expensiveLow$$$
Solid WoodWarm, natural lookNeeds regular sealing, can warpHigh$$$

And don’t forget about finishes! Matte finishes are having a moment in 2024, offering a soft, sophisticated look that’s also great at hiding water spots and fingerprints. But if you’re all about that shine, glossy finishes can add a touch of glamour to your space.

Remember, mixing materials and finishes can create depth and interest in your bathroom design. Just make sure everything works together harmoniously. You don’t want your bathroom looking like it got dressed in the dark!

Attention to Lighting: Let There Be Light!

Lighting can make or break a bathroom. Too harsh, and you’ll be squinting at your reflection like you’re staring into the sun. Too dim, and you might end up leaving the house with mismatched socks (been there, done that!). Here’s how to get it juuust right:

  1. Layer your lighting: Think of it like a cake. You’ve got your base layer (ambient lighting), your filling (task lighting), and your frosting (accent lighting).
  2. Consider natural light: If you’ve got a window, make the most of it! Light-filtering shades can provide privacy while still letting in that gorgeous natural glow.
  3. Don’t forget the tub area: A soft, dimmable light over the tub can create the perfect ambiance for a relaxing soak.
  4. Color temperature matters: Opt for bulbs in the 2700K-3000K range for a warm, flattering light that won’t make you look like you’ve seen a ghost first thing in the morning.
  5. Smart lighting: Consider installing smart bulbs or a smart switch. Being able to dim the lights or change colors with your voice? Now that’s living in 2024!

Remember, good lighting isn’t just about function – it’s about creating a mood. So go ahead, play around with different options until you find your perfect glow-up!

Conclusion: Your Dream Bathroom Awaits!

Whew! We’ve covered a lot of ground, haven’t we? From warm wood cabinetry to high-tech toilets, from bold tile patterns to clever storage solutions, we’ve explored all the exciting trends and practical tips for creating a fabulous spring bathroom makeover in 2024.

Remember, the most important thing is to create a space that works for you. Maybe you’re all about that spa-like luxury, or perhaps you’re more interested in maximizing functionality in a small space. Whatever your priorities, there’s a perfect bathroom design out there waiting for you.

So go ahead, dream big! Mix and match these ideas, add your own personal touch, and before you know it, you’ll have a bathroom that’s not just a functional space, but a true reflection of your style.

And hey, once you’ve completed your makeover, why not invite some friends over to show off your handiwork? Just maybe don’t all pile into the bathroom at once – no matter how fabulous it is, it’s probably not built for a crowd!

Happy renovating, and may your spring bathroom makeover be as refreshing as a cool splash of water on a warm day!

FAQs: Your Burning Bathroom Questions Answered!

Q: How much does a typical bathroom makeover cost?

A: Ah, the million-dollar question (hopefully not literally)! The cost can vary widely depending on the scope of your project. A minor refresh might set you back $5,000-$15,000, while a major overhaul could run anywhere from $20,000 to $50,000 or more. Remember, it’s not just about the fixtures – labor, unexpected issues, and those little extras can add up quick!

Q: How long does a bathroom renovation typically take?

A: How long is a piece of string? Just kidding! On average, you’re looking at anywhere from 2-3 weeks for a simple makeover to 6-8 weeks for a complete gut job. But remember, unexpected issues can crop up (old houses, I’m looking at you), so it’s always wise to add a buffer to your timeline.

Q: What’s the best flooring for a bathroom?

A: Ooh, tough one! It really depends on your needs and budget. Porcelain tile is a classic choice – it’s durable, water-resistant, and comes in tons of styles. Luxury vinyl plank (LVP) is another great option – it’s budget-friendly and can mimic the look of wood or stone. For a luxe feel, natural stone like marble is gorgeous (but high-maintenance). Just whatever you do, maybe skip the carpet, yeah?

Q: How can I make my small bathroom look bigger?

A: Mirrors, mirrors, and more mirrors! A large mirror can really open up a space. Light colors on walls and floors can also help. Consider a pedestal sink instead of a bulky vanity, and opt for clear glass shower doors instead of a curtain. Oh, and don’t forget about lighting – a well-lit space always feels larger!

Q: Is it worth it to add a bathtub if I only have a shower?

A: That depends on a few things. Do you love baths? Will you use it regularly? Do you have the space? A tub can be a lovely addition, especially if you enjoy a good soak. It can also be a selling point if you’re thinking of moving in the future. But if you’re short on space or just not a bath person, a luxurious shower might be a better investment.

Remember, your bathroom makeover should be a reflection of your personal style and needs. Don’t be afraid to think outside the box and create a space that truly makes you happy. After all, you’re the one who’ll be using it every day!

Now, go forth and create the bathroom of your dreams. And don’t forget to share your before and after photos – we love a good transformation story!


25 Expert Tips to Make Your Home Energy Efficient and Save Money

0

Hey there, fellow homeowners! Are you tired of those sky-high energy bills eating away at your hard-earned cash? Well, you’re not alone. I remember the day I opened my utility bill and nearly fainted – it was like someone had slapped me with a wet fish! That’s when I decided enough was enough. It was time to whip my home into energy-efficient shape

In this article, I’m gonna share 25 expert tips to make your home energy efficient that’ll not only help you save some serious dough but also turn your humble abode into an eco-friendly paradise. Trust me, your wallet (and Mother Earth) will thank you!

What You’ll Learn

  • How to properly insulate and seal your home
  • Smart strategies for efficient heating and cooling
  • Lighting hacks that’ll brighten your day (and lighten your bills)
  • Clever ways to manage your appliances and electronics
  • Water-saving techniques that don’t compromise comfort
  • Window and door upgrades for maximum efficiency
  • Landscaping tricks to naturally regulate your home’s temperature
  • The lowdown on alternative energy options

By the time you’re done reading, you’ll be armed with a toolkit of energy-saving strategies that’ll make your neighbors green with envy. So, grab a cup of joe, get comfy, and let’s dive into the world of energy efficiency!

Insulation and Sealing: Your Home’s Cozy Cocoon

Let’s kick things off with the bread and butter of energy efficiency – insulation and sealing. Think of your home as a giant thermos. You want to keep the hot stuff hot and the cold stuff cold, right? Well, that’s exactly what proper insulation and sealing do for your home.

1. Upgrade Your Attic Insulation: Don’t Let Your Money Float Away!

Picture this: it’s the dead of winter, and your hard-earned heat is making a beeline for the attic, throwing a party up there while you’re shivering below. Not cool, right? (Pun totally intended!)

Here’s the deal: a well-insulated attic can save you up to 15% on your heating and cooling costs. That’s nothing to sneeze at! So, roll up those sleeves and get to work. You’ve got options:

  • Fiberglass batts: The classic choice. Easy to install, but watch out for those itchy fibers!
  • Blown-in cellulose: Made from recycled paper products. Eco-friendly and fills those nooks and crannies like a champ.
  • Spray foam: The heavyweight champion of insulation. It expands to fill every gap but can be pricier.

Pro tip: Before you go insulation crazy, check for any roof leaks. You don’t want to create a moldy mess up there!

2. Seal Those Sneaky Air Leaks: Show Drafts the Door!

Ever feel like you’re in a haunted house with all those mysterious drafts? Time to play detective and hunt down those air leaks! Grab a candle or incense stick and slowly move it around windows, doors, and other potential leak spots. If the flame flickers or the smoke wavers, you’ve caught a culprit red-handed.

Common leak hotspots include:

  • Window and door frames
  • Electrical outlets
  • Baseboards
  • Attic hatches
  • Plumbing penetrations

Once you’ve identified the leaks, it’s time to seal ’em up. Caulk is your best friend for smaller gaps, while expanding foam works wonders for larger ones. And don’t forget about those outlet gaskets – they’re like tiny shields for your walls!

3. Wall and Floor Insulation: Wrap Your Home in a Warm Hug

Now, I know what you’re thinking – “Insulating my walls sounds like a big, messy job!” And you’re not wrong. But hear me out: properly insulated walls can save you up to 20% on your heating and cooling costs. That’s like getting a fifth of your energy for free!

If you’re building a new home or doing major renovations, this is a no-brainer. But even if you’re not, there are still options:

  • Blow-in insulation: A pro can drill small holes and fill your walls with insulation. It’s like magic!
  • Rigid foam boards: Great for unfinished basement walls or crawl spaces.
  • Radiant barriers: Perfect for hot climates to reflect heat away from your home.

As for floors, don’t neglect them! Insulating your floors, especially over unheated spaces like garages or crawl spaces, can make a world of difference in comfort and energy savings.

4. Weatherstripping: The Unsung Hero of Energy Efficiency

Weatherstripping is like the duct tape of the energy efficiency world – it’s not glamorous, but boy, does it get the job done! This humble material can seal up those pesky gaps around doors and windows, keeping your conditioned air where it belongs – inside your home.

There are several types of weatherstripping to choose from:

  • Adhesive-backed foam tape: Easy to install but may not last as long.
  • V-strip (tension seal): Durable and nearly invisible when installed.
  • Door sweeps: Perfect for those gaps at the bottom of doors.

Remember, the key is to choose the right type for each location and install it correctly. A little patience goes a long way here!

5. Don’t Forget the Chimney: Santa’s Not the Only One Coming Down!

Ah, the fireplace – so cozy, so romantic, and… so inefficient? Yep, you heard that right. When not in use, your chimney can be a major source of heat loss. It’s like leaving a window wide open in the middle of winter!

But fear not, there are ways to tackle this:

  • Chimney balloons: Inflatable devices that block the chimney when not in use.
  • Glass fireplace doors: Keep the warm air in and the cold air out.
  • Chimney caps: Prevent downdrafts and keep critters out.

Just remember to remove any blocking devices before lighting a fire. Safety first, folks!

Heating and Cooling: Comfort Without Breaking the Bank

Let’s face it, heating and cooling your home can feel like you’re throwing money out the window. But with these smart strategies, you’ll be chillin’ (or stayin’ toasty) without emptying your wallet.

6. Embrace the Magic of Programmable Thermostats

Remember the days of constantly fiddling with your thermostat, trying to find that perfect balance between comfort and cost? Well, those days are history, my friend! Enter the programmable thermostat – your new best buddy in the fight against energy waste.

These nifty devices let you set different temperatures for different times of the day. Heading to work? Tell your thermostat to ease up a bit. Coming home? Have it warm things up just in time for your arrival. It’s like having a personal climate concierge!

Pro tip: For maximum savings, aim for these settings:

  • Winter: 68°F when you’re awake, 60°F when you’re asleep or away
  • Summer: 78°F when you’re home, 85°F when you’re away

And if you’re feeling fancy, consider a smart thermostat. These bad boys learn your habits and can even be controlled from your phone. How cool is that?

7. Show Your HVAC Some TLC: Regular Maintenance is Key

Your HVAC system is like a car – neglect it, and it’ll let you down when you need it most. Plus, a well-maintained system runs more efficiently, saving you moolah in the long run.

Here’s your HVAC maintenance cheat sheet:

  • Change those filters regularly (every 1-3 months)
  • Keep outdoor units clear of debris
  • Clean air vents and registers
  • Schedule professional tune-ups at least once a year

I once skipped a year of maintenance, thinking I was saving money. Big mistake! My system conked out in the middle of a heatwave. Trust me, sweating buckets while waiting for an emergency repair is no fun!

8. Out With the Old, In With the New: Upgrade Your Heating and Cooling Systems

I know, I know – replacing your HVAC system sounds about as fun as a root canal. But hear me out: if your system is more than 10-15 years old, upgrading to a new, energy-efficient model could slash your energy bills by up to 20%!

When shopping for a new system, look for:

  • The ENERGY STAR label
  • High SEER ratings for air conditioners (aim for 15 or higher)
  • High AFUE ratings for furnaces (90% or higher is great)

Yes, it’s a big upfront cost. But think of it as an investment in your home and your financial future. Your future self will thank you!

9. Harness the Power of Ceiling Fans: Your Year-Round Friends

Ceiling fans aren’t just for summer, folks! These versatile beauties can help you save energy all year round. Here’s the scoop:

In summer:

  • Run fans counterclockwise to create a cooling breeze
  • This can make you feel up to 4°F cooler, letting you raise your thermostat and save on AC costs

In winter:

  • Reverse the direction to clockwise
  • This pushes warm air down from the ceiling, helping distribute heat more evenly

Just remember: fans cool people, not rooms. So turn them off when you leave to avoid wasting energy.

10. Zone Your Home: Because One Size Doesn’t Fit All

Why heat or cool your entire house when you’re only using part of it? That’s where zoning comes in handy. By dividing your home into different “zones,” you can control the temperature in each area separately.

There are a few ways to achieve this:

  • Install a zoned HVAC system (best for new construction or major renovations)
  • Use space heaters or window AC units strategically (but be careful – these can be energy hogs if overused)
  • Close vents and doors in unused rooms (but don’t close more than 20% of your vents to avoid straining your system)

I once set up a mini-split system in my home office. Now I can work comfortably without cooling the entire house. It’s been a game-changer for my energy bills!

Lighting: Bright Ideas for a Lighter Bill

Who says you need to be left in the dark to save on energy? With these clever lighting tips, you’ll be seeing the light (and some extra cash in your wallet)!

11. LED the Way: Switch to Energy-Efficient Bulbs

Remember those old-school incandescent bulbs that got hot enough to fry an egg? Well, it’s time to give ’em the boot! LED bulbs are the cool kids on the block now, and for good reason.

Here’s why LEDs rock:

  • They use up to 75% less energy than incandescent bulbs
  • They last up to 25 times longer (I’m talking years, folks!)
  • They come in all sorts of colors and brightness levels

Sure, LEDs might cost a bit more upfront, but they’ll save you a bundle in the long run. Plus, you won’t be up on a ladder changing bulbs every few months. Win-win!

Pro tip: Look for the ENERGY STAR label when buying LEDs. These babies meet strict efficiency standards and often come with longer warranties.

12. Get Smart with Sensors and Timers

Ever walked into an empty room with the lights blazing? Yeah, me too. It’s like throwing money out the window! But fear not, my forgetful friends – motion sensors and timers are here to save the day (and your cash).

Here’s how to put these smart gadgets to work:

  • Install motion sensors in low-traffic areas like hallways or bathrooms
  • Use timers for outdoor lighting (no more forgetting to turn off the porch light!)
  • Set up smart plugs to control lamps from your phone

I once installed a motion sensor in my garage. No more fumbling for the light switch with arms full of groceries, and no more accidentally leaving the light on all night. It’s the little things, you know?

13. Harness the Power of Natural Light

Listen up, folks – the sun is giving away free light, and it’s time we took advantage! Maximizing natural light isn’t just good for your energy bill; it’s great for your mood too. Here’s how to let the sunshine in:

  • Keep windows clean (dirty windows can block up to 20% of natural light)
  • Use light-colored curtains or blinds to diffuse light without blocking it
  • Consider installing skylights or solar tubes in dark areas
  • Arrange furniture to avoid blocking windows

And here’s a nifty trick: place mirrors opposite windows to bounce light deeper into your room. It’s like having two windows for the price of one!

Appliances and Electronics: Power Players in Energy Efficiency

Alright, folks, it’s time to talk about the big energy guzzlers in your home. You know, those shiny gadgets and appliances that make our lives easier but can also make our wallets lighter if we’re not careful.

14. Embrace the ENERGY STAR: Your Guide to Efficient Appliances

Ever noticed that little blue star on some appliances? That’s not just for show, my friends. ENERGY STAR is like the superhero of the appliance world, fighting energy waste one device at a time.

Here’s the lowdown:

  • ENERGY STAR appliances use 10-50% less energy than standard models
  • They often have cool features that boost efficiency even more
  • Many utility companies offer rebates for ENERGY STAR purchases (cha-ching!)

When it’s time to replace old appliances, look for that star. It’s like a badge of honor saying, “Hey, I’m gonna save you money!”

I remember when I replaced my ancient fridge with an ENERGY STAR model. My electricity bill dropped so much, I thought the power company had made a mistake!

15. Unplug to Power Down: Battling the Energy Vampires

Brace yourselves, ’cause I’m about to drop a bombshell: your appliances are secretly sucking energy even when they’re turned off! These sneaky energy vampires can account for up to 10% of your home’s energy use.

Common culprits include:

  • TVs and cable boxes
  • Computers and printers
  • Phone chargers
  • Coffee makers

The solution? Unplug ’em when you’re not using ’em. I know, I know, it’s a pain. But here’s a hack: use power strips. One flick of the switch, and boom – you’ve slain a whole gang of energy vampires!

16. Get Smart with Power Strips

Speaking of power strips, let me introduce you to their cooler, smarter cousin: the smart power strip. These bad boys take energy saving to the next level.

Here’s how they work:

  • They can detect when devices are in standby mode
  • They automatically cut power to those devices
  • Some even let you control outlets via your smartphone

I’ve got one for my entertainment center. When I turn off the TV, it automatically cuts power to the DVD player, game console, and soundbar. It’s like having a personal energy-saving assistant!

Water Usage: Making Every Drop Count

Water might seem cheap, but heating it sure isn’t! By being smart about our water usage, we can save both water and energy. Let’s splash into some money-saving tips!

17. Low-Flow for the Win: Install Water-Efficient Fixtures

Remember those showers that felt like you were standing under a fire hose? Yeah, those days are over. Low-flow fixtures are the new cool kids on the block, and they’re here to save you some serious cash.

Here’s what you need to know:

  • Low-flow showerheads use 2.5 gallons per minute or less (compared to 5-8 GPM for older models)
  • Efficient faucet aerators can reduce flow by 30% or more
  • WaterSense-labeled fixtures are independently certified to be efficient

I switched to a low-flow showerhead last year, and you know what? I can’t even tell the difference – except on my water bill!

18. Plug Those Leaks: The Silent Water Wasters

Drip, drip, drip… That’s the sound of money going down the drain! A leaky faucet might seem like no big deal, but those little drips can add up to gallons of wasted water (and energy to heat it).

Common culprits to check:

  • Faucets and showerheads
  • Toilets (listen for phantom flushes)
  • Water heater connections
  • Outdoor spigots

Pro tip: Put a few drops of food coloring in your toilet tank. If it shows up in the bowl without flushing, you’ve got a leak!

19. Chill Out with Your Laundry: Cold Water Washing

Here’s a cold, hard fact: heating water for your washing machine uses a ton of energy. But guess what? Most of your clothes don’t need hot water to get clean!

Try these laundry hacks:

  • Use cold water for most loads (save hot for really dirty stuff)
  • Choose cold-water detergents for better results
  • Wash full loads to maximize efficiency

I switched to cold water washes and you know what? My clothes are just as clean, and my energy bill is a lot lighter!

20. Insulate Your Water Heater: Give It a Cozy Jacket

Your water heater works hard to keep that H2O toasty. Why not help it out with a little insulation? It’s like giving your water heater a warm hug – and it’ll love you back with energy savings.

Here’s the deal:

  • Insulating your water heater can reduce heat loss by 25-45%
  • It can save you 7-16% on water heating costs
  • Pre-cut jackets are available and easy to install

Just be careful not to cover the thermostat on electric heaters or the top, bottom, or burner compartment on gas heaters. Safety first, folks!

Windows and Doors: Your Home’s Energy Gatekeepers

Think of your windows and doors as the bouncers of your home’s energy club. They decide what gets in and what stays out. Let’s make sure they’re doing their job right!

21. Double Up: The Magic of Double-Pane Windows

Single-pane windows are so last century! If you’re still rocking these oldies, it’s like leaving your home’s energy efficiency out in the cold (or heat, depending on the season).

Here’s why double-pane windows rock:

  • They create an insulating air pocket between the panes
  • Can reduce energy loss by up to 50% compared to single-pane windows
  • Some even have special gas fills for extra insulation

I replaced my living room windows with double-pane ones last year. Now my cat can enjoy her window perch without me worrying about sky-high heating bills!

22. Dress Your Windows: Insulating Window Treatments

Who says window treatments are just for looks? With the right choices, they can be your secret energy-saving superheroes!

Some stylish and efficient options:

  • Cellular shades (those honeycomb-looking ones)
  • Thermal curtains or drapes
  • Interior shutters
  • Reflective blinds

Pro tip: In summer, close your curtains during the day to keep out heat. In winter, open them to let in that free solar heat!

23. Weather the Storm: Consider Storm Windows and Doors

Storm windows and doors are like putting a windbreaker over your regular jacket. They add an extra layer of protection against the elements.

Benefits of storm windows and doors:

  • Can reduce heat loss through windows by 25-50%
  • Cheaper than replacing windows entirely
  • Can be removed seasonally if desired

I installed storm windows on my drafty old Victorian, and it’s like I gave my house a warm, cozy sweater!

Landscaping and Outdoor: Nature’s Energy-Saving Ally

Who says saving energy is just an indoor sport? Your yard can be a powerful player in your energy-efficiency game. Let’s dig into some natural ways to keep your home comfy and your bills low.

24. Throw Some Shade: Strategic Tree Planting

Trees aren’t just pretty to look at – they’re nature’s air conditioners! With some smart planting, you can create a natural cooling system for your home.

Here’s the lowdown on leafy energy-savers:

  • Deciduous trees on the south and west sides of your home provide shade in summer
  • They lose leaves in winter, allowing sunlight to warm your home
  • Evergreens on the north side can block cold winter winds

I planted a maple tree on the west side of my house a few years back. Now my living room is noticeably cooler in the summer afternoons. It’s like having a giant, leafy umbrella!

25. Light Up the Night (Efficiently): Outdoor Solar Lighting

Why pay to light up your yard when the sun can do it for free? Solar-powered outdoor lights are like having little energy-saving elves working for you.

Cool things about solar lights:

  • Zero operating costs (thanks, sun!)
  • Easy to install – no wiring needed
  • Available in all sorts of styles, from path lights to security floodlights

I lined my driveway with solar path lights last year. Now I never have to remember to turn on the outdoor lights, and my nighttime curb appeal is through the roof!

Conclusion

Whew! We’ve covered a lot of ground, haven’t we? From sealing up those sneaky drafts to harnessing the power of the sun, we’ve explored 25 expert tips to make your home energy efficient and save you some serious cash.

Remember, you don’t have to tackle all these tips at once. Start small, maybe with switching to LED bulbs or sealing up some air leaks. As you see your energy bills shrink, you’ll be motivated to take on bigger projects.

The journey to an energy-efficient home is just that – a journey. But with each step, you’re not just saving money; you’re also doing your part for the planet. And that, my friends, is something to be proud of.

So, what are you waiting for? Pick a tip, any tip, and start your energy-saving adventure today. Your wallet (and Mother Earth) will thank you!

FAQs

Q: How much money can I really save by making my home energy efficient?

A: The amount you save can vary widely depending on your current energy usage, the size of your home, and which energy-efficient measures you implement. However, according to the U.S. Department of Energy, most homeowners can save 20-30% on their energy bills through efficiency upgrades. That could mean hundreds or even thousands of dollars per year!

Q: Are energy-efficient upgrades worth the upfront cost?

A: In most cases, absolutely! While some upgrades (like replacing windows or your HVAC system) can be pricey, they often pay for themselves over time through energy savings. Plus, many energy-efficient upgrades can increase your home’s value. It’s a win-win!

Q: I’m renting. What energy-saving tips can I use?

A: Great question! There are plenty of ways renters can save energy too. Try using LED bulbs, adding weatherstripping to doors and windows (with your landlord’s permission), using smart power strips, and following our tips for efficient use of appliances and water. Every little bit helps!

Q: How often should I have my HVAC system serviced?

A: It’s recommended to have your HVAC system professionally serviced at least once a year. Spring is a good time for AC maintenance, while fall is ideal for heating system check-ups. Regular maintenance keeps your system running efficiently and can prevent costly breakdowns.

Q: Can landscaping really make a difference in my home’s energy efficiency?

A: Absolutely! Strategic landscaping can provide natural shade in summer and wind protection in winter, potentially reducing your heating and cooling costs by up to 25%. Plus, it makes your yard look great – talk about a beautiful way to save energy!

Remember, every home is unique, so what works best for you might be different from your neighbor. Don’t be afraid to experiment and find the energy-saving strategies that fit your lifestyle best. Here’s to lower energy bills and a greener future!

Home Building on a Budget: Secrets to Affordable Construction

0

Ever dreamed of building your own home, but worried your wallet might not stretch that far? You’re not alone! The idea of constructing a house from the ground up can be both exhilarating and terrifying, especially when you start crunching the numbers. But here’s the kicker: with some savvy planning and a few insider tricks, you can turn that dream into a reality without emptying your savings account.

In this guide, we’re gonna dive deep into the world of budget-friendly home construction. We’ll uncover the secrets that’ll help you build a home that’s not just affordable, but also a place you’ll love to call your own. From clever design hacks to money-saving construction techniques, we’ve got you covered. So, buckle up, future homeowners – it’s time to embark on a journey that’ll bring you one step closer to your dream home!

What You’ll Learn

  • How to effectively plan and stick to a home construction budget
  • Design strategies that maximize space while minimizing costs
  • Cost-effective construction methods and materials
  • Smart ways to prioritize features and upgrades
  • Tips for managing finances throughout the building process
  • Strategies for finding affordable land and navigating permits

By the time you finish this article, you’ll be armed with a toolkit of budget-friendly strategies that’ll make your home-building journey smoother and more affordable. Whether you’re a first-time builder or looking to cut costs on your next project, these tips and tricks will help you navigate the complex world of home construction without breaking the bank. Ready to turn that “someday” dream into a “right now” reality? Let’s dive in!

Planning Your Home Build Budget

Let’s face it – building a home isn’t exactly cheap. But with some careful planning and a bit of financial finesse, you can make it a whole lot more affordable. So, let’s roll up our sleeves and dig into the nitty-gritty of budget planning for your dream home.

Analyzing the Costs Involved in Building a Home

Building a home is like putting together a giant puzzle – there are a ton of pieces, and they all cost money. Here’s a quick breakdown of the major expenses you’ll need to factor in:

  1. Land costs: This can vary wildly depending on location, but it’s often a big chunk of your budget.
  2. Site preparation: Think clearing, grading, and getting utilities hooked up.
  3. Foundation: The literal groundwork for your home.
  4. Framing: The skeleton of your house.
  5. Exterior finishes: Siding, roofing, windows, and doors.
  6. Interior finishes: Drywall, flooring, cabinets, and all the pretty stuff.
  7. Mechanical systems: Plumbing, electrical, and HVAC.
  8. Labor costs: Unless you’re planning to build the whole thing yourself!
  9. Permits and fees: The necessary evil of bureaucracy.

Remember, these are just the broad strokes. There’ll be a lot of little expenses that pop up along the way. But don’t worry – we’ll talk about how to handle those curveballs later!

Understanding the Key Factors That Impact the Budget

Now, here’s where things get interesting. Your budget isn’t just a static number – it’s influenced by a whole bunch of factors. Some of the biggies include:

  • Location: Building in the heart of the city? Prepare for your wallet to take a hit.
  • Size: Bigger isn’t always better, especially when it comes to your bank account.
  • Design complexity: Fancy features and unique architectural elements can send costs soaring.
  • Materials: High-end finishes will cost you, but there are ways to get a luxe look for less.
  • Timeline: Rushing the process often means paying a premium.
  • Market conditions: The cost of materials and labor can fluctuate based on market trends.

Understanding these factors is like having a secret weapon in your budget-planning arsenal. It’ll help you make informed decisions about where to splurge and where to save.

Setting Realistic Financial Goals for the Construction Project

Alright, time for a reality check. We all want our dream home, but unless you’ve got a money tree in the backyard, you’ll need to set some realistic financial goals. Here’s how to do it:

  1. Start with your max budget: What’s the absolute most you can afford to spend?
  2. Build in a buffer: Trust me, you’ll thank yourself later. Aim for at least 10-20% of your total budget.
  3. Prioritize your must-haves: What features are non-negotiable? What can you live without?
  4. Get multiple quotes: Don’t just go with the first contractor you meet. Shop around!
  5. Be flexible: Sometimes, you gotta roll with the punches and adjust your plans.

Remember, setting realistic goals doesn’t mean settling for less. It means being smart about your choices so you can get the most bang for your buck. And speaking of smart choices…

Designing for Affordability

You know what they say – good design is worth its weight in gold. But when you’re building on a budget, your design choices can make or break your bank account. Let’s explore some savvy design strategies that’ll help you create a beautiful home without emptying your wallet.

Selecting a Simple and Efficient Floor Plan to Minimize Construction Costs

When it comes to affordable home building, sometimes less really is more. A simple, efficient floor plan can save you a bundle without sacrificing style or functionality. Here’s why:

  • Fewer walls = less material and labor costs
  • Simpler roof designs are cheaper to construct
  • Rectangular shapes are generally more cost-effective than complex layouts
  • Open floor plans can make a smaller home feel more spacious

But don’t worry – simple doesn’t have to mean boring! With some creative touches and smart design choices, you can turn a basic floor plan into a stunning home that’s uniquely yours.

Pro tip: Consider a two-story design. It often costs less per square foot than a sprawling single-story home, plus you’ll save on foundation and roofing costs.

Maximizing Space Utilization to Avoid Unnecessary Square Footage

Here’s a secret: you probably don’t need as much space as you think you do. One of the best ways to keep costs down is to make every square foot count. Try these space-saving tricks:

  • Use built-ins for storage instead of large closets
  • Create multi-functional spaces (like a home office that doubles as a guest room)
  • Opt for an eat-in kitchen instead of a separate formal dining room
  • Consider smaller, more efficient appliances

Remember, it’s not about how much space you have – it’s about how well you use it. A well-designed 1,500 square foot home can feel more comfortable and functional than a poorly planned 2,500 square foot McMansion.

Considering Future Expansions During the Initial Design Phase

Let’s talk about future-proofing your home. While you’re focused on keeping costs down now, it’s smart to think about potential expansions down the road. Here’s why:

  • It’s often cheaper to plan for future additions now than to retrofit later
  • You can rough-in plumbing and electrical for future bathrooms or additions
  • Designing with expansion in mind can increase your home’s long-term value

Some ideas to consider:

  • Unfinished basement or attic space that can be converted later
  • Designing the roof to accommodate a future second story
  • Leaving space for a future garage or sunroom

By thinking ahead, you’re not just building a home for today – you’re creating a space that can grow and change with your family’s needs. Now that’s what I call smart design!

Cost-Effective Construction Methods

Alright, let’s get our hands dirty! We’ve got the budget planned and a smart design in mind, but now it’s time to talk about how we’re actually gonna build this thing without breaking the bank. Ready to learn some tricks of the trade?

Exploring Economical Building Materials and Construction Techniques

Who says you need to spend a fortune on materials to build a great home? With a little creativity and know-how, you can find budget-friendly alternatives that’ll do the job just as well. Here are some ideas to get you started:

  • Consider using prefab or modular components: These can be cheaper and faster to install than building everything from scratch.
  • Look into alternative framing methods: Things like structural insulated panels (SIPs) or insulated concrete forms (ICFs) can save on labor and energy costs in the long run.
  • Opt for engineered wood products: They’re often cheaper and more stable than solid wood.
  • Don’t overlook recycled or reclaimed materials: They can add character to your home and be easy on your wallet.

Remember, it’s not just about the materials themselves, but how you use ’em. For instance, standard-sized materials often result in less waste and lower costs. And speaking of waste…

Tips for Reducing Labor Costs Without Compromising Quality

Labor can eat up a big chunk of your budget faster than you can say “home sweet home.” But don’t worry, there are ways to keep those costs in check:

  1. Be your own general contractor: If you’re up for it, this can save you a bundle. Just make sure you’re ready for the responsibility!
  2. DIY where you can: If you are up to the task, tackle some of the simpler tasks yourself, like painting or landscaping.
  3. Choose simpler designs: The less complicated your home’s design, the less time (and money) it’ll take to build.
  4. Schedule efficiently: Good planning can prevent costly delays and keep your crew working productively.
  5. Consider off-season construction: Builders might offer better rates during their slower months.

Just remember, cutting corners on skilled labor can cost you more in the long run. The goal is to be smart about where and how you spend on labor, not to skimp on quality.

Strategies for Saving on Foundation and Structural Expenses

The foundation might not be the sexiest part of your new home, but it’s crucial – both for your house’s stability and your budget. Here are some ways to keep costs down without compromising on quality:

  • Choose a simple foundation design: A basic slab or crawl space is often cheaper than a full basement.
  • Opt for a walkout basement on a sloped lot: This can reduce the amount of excavation needed.
  • Consider alternative foundation systems: Things like pier and beam or frost-protected shallow foundations can be more cost-effective in some situations.
  • Don’t overbuild: Work with an engineer to ensure your foundation is adequate without being excessive.

And when it comes to the structure itself:

  • Stick to standard ceiling heights: Those vaulted ceilings might look nice, but they’ll cost ya.
  • Use trusses instead of stick-framing for your roof: They’re often cheaper and faster to install.
  • Optimize your floor plan: Aim for a design that minimizes the need for long-span beams or complex structural elements.

Remember, a solid foundation and structure are worth investing in – they’re literally what your home is built on. But with some smart choices, you can ensure they’re rock-solid without rocking your budget.

Budget-Friendly Features and Upgrades

Now, let’s talk about the fun stuff – all those features and upgrades that’ll make your house feel like a home. But hold your horses! Before you go crazy with fancy fixtures and high-end finishes, let’s explore some budget-friendly options that’ll give you the most bang for your buck.

Identifying Energy-Efficient Options to Save on Long-Term Utility Costs

Here’s a secret: sometimes spending a little more upfront can save you big time in the long run. Energy-efficient features are a perfect example. They might cost a bit more initially, but they’ll keep your utility bills in check for years to come. Some ideas to consider:

  • Invest in good insulation: It’s like a cozy sweater for your house, keeping you warm in winter and cool in summer.
  • Choose energy-efficient windows: They’ll help regulate your home’s temperature and reduce your HVAC costs.
  • Install a programmable thermostat: It’s like having a personal energy-saving assistant.
  • Opt for LED lighting: They use way less energy and last much longer than traditional bulbs.
  • Consider solar panels: If your budget allows, they can significantly reduce your electricity costs over time.

Remember, the goal is to balance upfront costs with long-term savings. It’s all about playing the long game!

Maximizing Tax Credits and Rebates Through Sustainable Building Practices

Uncle Sam wants you to build green – so much so that he’s willing to give you some money back for doing it! Many sustainable building practices can qualify you for tax credits and rebates. Here’s how to cash in:

  • Research federal, state, and local incentives for energy-efficient home features.
  • Look into rebates offered by utility companies for energy-saving appliances.
  • Consider certifications like ENERGY STAR or LEED – they can qualify you for additional incentives.
  • Keep detailed records of your green upgrades for tax time.

Pro tip: These incentives change frequently, so make sure to check what’s currently available in your area before making any decisions.

Prioritizing Essential Features and Postponing Non-Essential Upgrades

I get it – you want your new home to have all the bells and whistles. But unless you’ve got money to burn, you’ll need to prioritize. Here’s how to decide what’s worth splurging on now and what can wait:

  1. Focus on the bones: Invest in good structural elements, insulation, and major systems first.
  2. Prioritize features that are hard to add later: Things like extra outlets or pre-wiring for home automation.
  3. Go for timeless over trendy: Choose classic finishes that won’t look dated in a few years.
  4. Consider your daily life: Splurge on features you’ll use every day, like a quality kitchen faucet or comfortable flooring.
  5. Plan for future upgrades: Leave space for that fancy kitchen island or home theater you’re dreaming of.

Remember, Rome wasn’t built in a day, and your perfect home doesn’t have to be either. It’s okay to start with the essentials and add luxuries over time as your budget allows.

Financial Management Throughout the Construction Process

Alright, let’s talk money, honey! Building a home is like riding a financial rollercoaster – there are ups, downs, and sometimes unexpected loops. But don’t worry, we’re gonna make sure you don’t lose your lunch (or your shirt) on this ride.

Tracking and Controlling Spending During Each Phase of the Build

Listen up, ’cause this is important: keeping tabs on your spending is crucial if you want to stay on budget. Here’s how to keep your finances in check throughout the build:

  1. Break it down: Divide your budget into phases (foundation, framing, finishing, etc.) and track spending for each.
  2. Use a spreadsheet or budgeting app: Trust me, your napkin math won’t cut it here.
  3. Keep all receipts: And I mean all of ’em. Even that $2 box of nails counts!
  4. Regular check-ins: Set aside time each week to review your spending and adjust as needed.
  5. Have a contingency fund: Aim for 10-20% of your total budget for those “oops” moments.

Remember, knowledge is power. The more aware you are of where your money’s going, the better equipped you’ll be to make smart financial decisions.

Tips for Obtaining Competitive Bids from Contractors and Suppliers

Ready to flex those negotiation muscles? Getting competitive bids can save you a bundle. Here’s how to do it like a pro:

  • Get at least three bids for each major job or purchase.
  • Be specific about what you want: The more detailed your request, the more accurate the bids will be.
  • Don’t automatically go for the lowest bid: Sometimes, you get what you pay for.
  • Ask about discounts: Bulk purchases or off-season work might score you a deal.
  • Be willing to negotiate: A little haggling can go a long way.

Pro tip: Always get bids in writing and make sure they include all costs, including materials, labor, and any potential extras.

Managing Unexpected Expenses and Staying Within the Budget

Surprise! No, not the fun kind – I’m talking about those unexpected expenses that can pop up during a build. Here’s how to roll with the punches:

  1. Expect the unexpected: Build that contingency fund we talked about earlier.
  2. Prioritize your must-haves: Know what you’re willing to compromise on if push comes to shove.
  3. Look for cost-cutting alternatives: If one area goes over budget, find ways to save in others.
  4. Communicate with your team: Keep everyone in the loop about budget constraints.
  5. Be flexible: Sometimes, a change of plans can lead to creative solutions.

Remember, it’s okay if things don’t go exactly as planned. The key is to stay calm, be flexible, and keep your eye on the prize – your beautiful new home!

Land Acquisition and Permitting Considerations

Now, let’s tackle the groundwork – literally! Finding the right piece of land and navigating the permitting process can be trickier than a game of Twister. But don’t worry, we’re gonna straighten it all out.

Strategies for Finding Affordable Land Suitable for Construction

Hunting for the perfect plot doesn’t have to cost an arm and a leg. Here are some savvy strategies to help you find affordable land:

  • Look beyond the obvious: Sometimes, hidden gems are tucked away in unexpected places.
  • Consider rural areas: They’re often cheaper than city lots, but make sure utilities are available.
  • Check for foreclosures or tax sales: You might snag a deal, but do your homework first!
  • Network: Let friends, family, and colleagues know you’re in the market. Word of mouth can work wonders.
  • Be patient: The right piece of land at the right price might take time to find.

Remember, cheaper isn’t always better. Make sure the land is suitable for building and won’t require expensive site work before you sign on the dotted line.

Understanding the Costs Associated with Obtaining Necessary Permits

Ah, permits – the necessary evil of the construction world. They might not be fun, but they’re crucial. Here’s what you need to know:

  • Research local requirements: Permit costs and processes vary widely by location.
  • Budget for it: Permit fees can add up, so factor them into your overall budget.
  • Consider hiring a pro: Sometimes, paying an expert to handle permits can save you time and headaches.
  • Plan ahead: The permitting process can take weeks or even months. Start early!

Pro tip: Be nice to your local permit office staff. A little kindness can go a long way in smoothing the process.

Ensuring Compliance with Regulations While Minimizing Expenses

Playing by the rules doesn’t have to break the bank. Here’s how to stay compliant without overspending:

  1. Do your homework: Understanding local codes can help you avoid costly mistakes.
  2. Consider an experienced local architect or builder: They’ll know the ins and outs of local regulations.
  3. Plan carefully: Changes mid-construction can lead to expensive re-inspections.
  4. Be present for inspections: This can help you address any issues on the spot.
  5. Don’t cut corners: Trying to skirt regulations can lead to hefty fines or even having to redo work.

Remember, compliance isn’t just about avoiding fines – it’s about ensuring your home is safe and built to last. And at the end of the day, isn’t that what we all want?

Conclusion

Whew! We’ve covered a lot of ground, haven’t we? From crunching numbers to picking out energy-efficient lightbulbs, building a home on a budget is quite the adventure. But here’s the thing – it’s totally doable. With some smart planning, savvy decision-making, and a dash of creativity, you can build a home that’s both affordable and awesome.

Let’s recap some of the key takeaways:

  1. Plan your budget meticulously and stick to it like glue.
  2. Design with efficiency in mind – every square foot counts!
  3. Don’t be afraid to get your hands dirty with some DIY work.
  4. Prioritize energy efficiency for long-term savings.
  5. Stay flexible and ready to problem-solve when unexpected costs pop up.
  6. Do your homework on land acquisition and permitting to avoid costly surprises.

Remember, building a home on a budget isn’t about cutting corners – it’s about making smart choices that align with your financial goals and lifestyle needs. It might take a bit more effort and creativity, but the payoff is worth it. Just imagine walking through the front door of your very own home, knowing you built it without breaking the bank. Now that’s something to be proud of!

So, future homeowners, are you ready to turn that dream into a reality? With these budget-friendly secrets up your sleeve, you’re well on your way to building a home that’s not just affordable, but truly yours. Now go forth and build wisely!

FAQs

To wrap things up, let’s address some common questions about building a home on a budget:

Q: How much can I really save by building my own home instead of buying?

A: The savings can be significant, potentially up to 15-25% of the home’s value. However, it depends on factors like your location, the current real estate market, and how much work you’re willing to do yourself. Remember, the biggest savings often come from being your own general contractor, but that also comes with the most responsibility.

Q: Is it cheaper to build a one-story or two-story home?

A: Generally, two-story homes are more cost-effective per square foot. They require less foundation and roofing, which are expensive components of home building. However, the best choice depends on your specific needs and lot constraints.

Q: How can I save on kitchen and bathroom costs without sacrificing quality?

A: Focus on layout efficiency to reduce plumbing costs. Choose mid-grade appliances and fixtures – they often perform just as well as high-end options. Consider alternatives like quartz instead of marble for countertops. And don’t underestimate the power of good lighting to make a space feel luxurious!

Q: Are there any areas where I shouldn’t try to cut costs?

A: Absolutely. Don’t skimp on structural elements, insulation, or major systems like electrical and plumbing. These are crucial for your home’s safety, efficiency, and long-term value. It’s often worth investing a bit more in these areas to avoid costly repairs down the line.

Q: How do I avoid going over budget during the build?

A: Stay vigilant with your spending tracking, build in a contingency fund of at least 10%, and be prepared to make trade-offs if unexpected costs arise. Communication is key – keep all your contractors and suppliers informed about your budget constraints.

Remember, building a home on a budget is as much about smart planning and decision-making as it is about finding the best deals. With the right approach, you can create a beautiful, comfortable home that doesn’t empty your bank account. Happy building!

Key Takeaways

Before we wrap up, let’s highlight the most important points to remember when building your home on a budget:

  1. Thorough planning is crucial: A well-thought-out budget and design can save you thousands.
  2. Simplicity is your friend: Simple designs are often more cost-effective and easier to build.
  3. Energy efficiency pays off: Investing in energy-efficient features can lead to significant long-term savings.
  4. Be flexible: Be prepared to make adjustments as you go to stay within your budget.
  5. DIY where possible: Taking on some tasks yourself can lead to substantial savings.
  6. Don’t neglect the essentials: Prioritize structural integrity and major systems over aesthetic upgrades.
  7. Research is key: From finding affordable land to understanding local building codes, knowledge is power.
  8. Communication is critical: Keep open lines of communication with all parties involved in your build.
  9. Plan for the future: Consider potential future needs in your initial design to avoid costly renovations later.
  10. Enjoy the process: Building your own home is a unique and rewarding experience. Embrace the journey!

With these tips and strategies in mind, you’re well-equipped to embark on your budget-friendly home building adventure. Remember, every decision you make is a step closer to your dream home. Good luck, and happy building!

Refresh Your Space With Soft Sea Green Shades: A Summer Decor Guide

As the summer season approaches, it’s time to breathe new life into your home decor. One of the most refreshing and on-trend colors to incorporate into your space this year is soft sea green. This soothing hue has the power to instantly revitalize any room, creating a calm and inviting atmosphere that’s perfect for the warm months ahead.

In this comprehensive guide, we’ll explore the many ways you can use soft sea green shades to transform your home into a summer oasis. From serene bedrooms to quirky bathrooms, we’ll provide you with expert tips, real-life examples, and plenty of inspiration to help you embrace this beautiful color trend. So, let’s dive in and discover how to refresh your space with soft sea green shades!

The Magic of Sea Green and White in the Bedroom

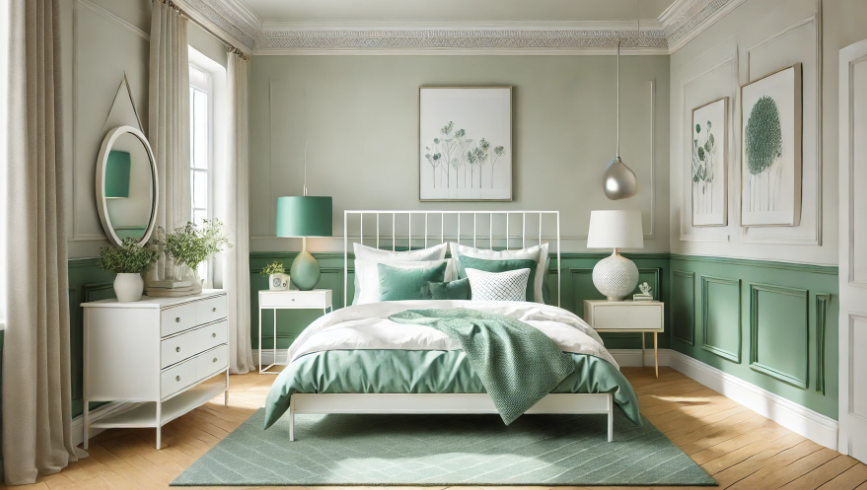
The look of ivory-painted walls, a neutral area rug and a chic silver bed

When it comes to creating a tranquil and refreshing bedroom, nothing beats the combination of soft sea green and crisp white. This understated color palette has the power to instantly transform your sleeping space into a serene retreat, perfect for unwinding after a long day in the summer heat.

Choosing the Perfect Bedding

To achieve this look, start by investing in high-quality bedding in soft sea green and white tones. Opt for a duvet cover or comforter with a subtle sea green pattern, such as delicate stripes or a watercolor-inspired print. Pair this with crisp white sheets and pillowcases for a clean and fresh look.

Complementary Elements for a Cohesive Look

To further enhance the serene atmosphere, consider painting your bedroom walls in a soothing ivory shade. This neutral backdrop will allow your sea green bedding to take center stage while creating a sense of spaciousness and light. Complete the look by adding a plush, neutral-colored area rug and a sleek silver bed frame for a touch of modern elegance.

Real-Life Inspiration: Instagram-Worthy Bedroom

For a stunning real-life example of this color scheme in action, check out this gorgeous bedroom by @livspace on Instagram. The combination of soft sea green bedding, ivory walls, and silver accents creates a dreamy and inviting space that’s perfect for summer slumbers.

Elevate Your Space with Contrasting Sea Green and Light Brown

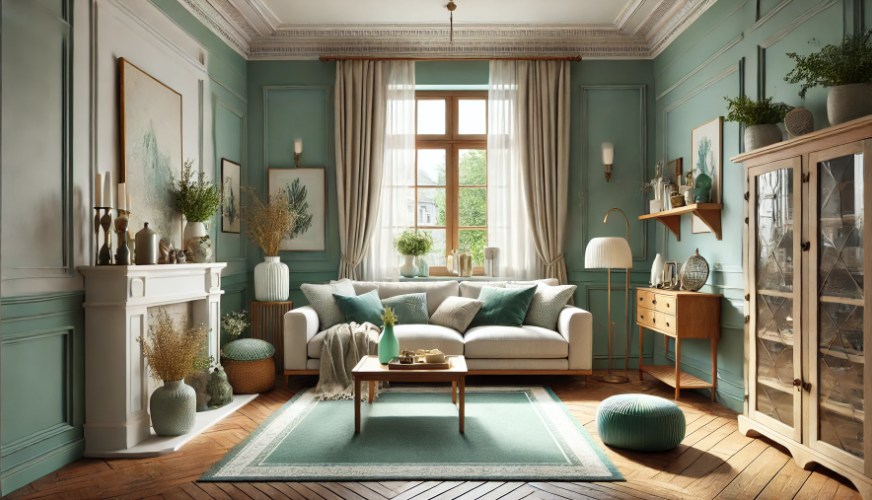
sea green with darker, contrasting hues like light brown

While sea green and white create a classic and refreshing look, pairing sea green with darker, contrasting hues like light brown can give this color trend a bold and sophisticated twist. By incorporating rich, wooden accents and warm, earthy tones, you can create a space that feels both inviting and luxurious.

Decorating with Bold Sea Green Accents

To achieve this look, start by adding bold sea green accents to your space, such as plush throw pillows or a cozy knit blanket. These vibrant pops of color will instantly draw the eye and create a focal point in your room. Pair these accents with dark, wooden furniture pieces, such as a rich walnut dresser or a rustic oak nightstand, to create a striking contrast.

Balancing the Look with Neutral Tones

To keep the space feeling balanced and harmonious, incorporate neutral tones like beige and cream through your bedsheets, curtains, or area rug. These soft, understated hues will help to soften the bold contrast between the sea green and light brown, creating a space that feels both dynamic and inviting.

Real-Life Inspiration: A Cozy and Sophisticated Bedroom

For a stunning example of this color scheme in action, take a look at this beautiful bedroom by @seagreendesigns on Instagram. The combination of bold sea green pillows, dark wooden accents, and beige bedsheets creates a space that feels both cozy and sophisticated – perfect for a summer retreat.

Transform Your Bathroom into a Sea Green Oasis

SEA GREEN BATHROOM

If you’re looking to give your bathroom a fresh and vibrant update this summer, look no further than the soft sea green color trend. By incorporating this soothing hue into your bathroom decor, you can create a space that feels both invigorating and spa-like – perfect for starting your day off right or unwinding after a long summer adventure.

Create a Stylish Foundation with Patterned Tiles

One of the most striking ways to incorporate sea green into your bathroom is through patterned floor tiles. Opt for tiles in a light sea green and white color scheme, such as a classic hexagon or arabesque pattern. These eye-catching tiles will create a stylish and refreshing foundation for your bathroom decor, instantly transforming the space into a summer oasis.

Add Depth with Darker Accent Tiles

bathroom designs featuring a bathtub with darker sea green and navy tiles in the shower and backsplash

To add depth and dimension to your bathroom, consider incorporating darker sea green and navy tiles into your shower or backsplash. These rich, saturated hues will create a stunning contrast against the lighter floor tiles, making your bathroom feel both dynamic and luxurious. Plus, the combination of light and dark sea green tones will evoke the feeling of a serene ocean retreat – perfect for a summer-inspired space.

Accessorize with Crisp White and Metallic Accents

To complete your sea green bathroom transformation, accessorize with crisp white towels, plush bath mats, and sleek, metallic fixtures.

To complete your sea green bathroom transformation, accessorize with crisp white towels, plush bath mats, and sleek, metallic fixtures. The white accents will help to brighten the space and create a clean, fresh look, while the metallic elements will add a touch of modern sophistication. Don’t forget to add some framed artwork or a vase of fresh flowers to bring a pop of personality and life to your newly refreshed bathroom.

Frequently Asked Questions (FAQs)

Q: How can I incorporate sea green into my living room decor?
A: There are many ways to incorporate sea green into your living room decor. Try adding sea green throw pillows, a cozy blanket, or a statement piece of artwork featuring this soothing hue. You can also paint an accent wall in a soft sea green shade or invest in a plush area rug with a subtle sea green pattern.

Q: What colors pair well with sea green?
A: Sea green pairs beautifully with a variety of colors, including crisp white, light brown, beige, navy, and metallic tones like silver and gold. For a fresh and classic look, pair sea green with white. For a bolder, more sophisticated vibe, try combining sea green with rich, wooden accents and warm, earthy tones.

Q: Can I use sea green in a small bathroom?
A: Absolutely! In fact, using soft sea green shades in a small bathroom can help to create a sense of spaciousness and tranquility. Opt for light sea green and white patterned tiles on the floor, and keep the walls and accessories bright and airy to maximize the space. Adding a few touches of dark sea green or navy can also help to add depth and dimension without overwhelming the small room.

Stitch Your Way to Spring: Embroidered Home Accents to Refresh Your Space

As the winter chill fades away and the first signs of spring emerge, it’s the perfect time to refresh your home decor. This year, one trend that’s been making waves in the interior design world is embroidered home accents. These charming, hand-crafted pieces add a touch of warmth, texture, and personality to any room. In this article, we’ll explore how you can incorporate embroidered accents into your home to create a fresh, inviting atmosphere that celebrates the beauty of spring.

What You’ll Learn

  • How embroidered accent cushions can transform a neutral sofa
  • Ways to revitalize your bedroom decor with embroidery
  • Using embroidered towels to add a playful touch to your bathroom
  • Color combinations and design ideas for spring
  • Tips for incorporating embroidered accents into your existing decor

By the end of this article, you’ll have a wealth of ideas and inspiration for using embroidered home accents to refresh your space this spring. Whether you’re a seasoned DIY enthusiast or simply looking to update your home with some trendy new pieces, this guide will help you embrace the embroidery trend with confidence and style.

Embroidered Accent Cushions for a Neutral Sofa

 Embroidered cushions  to transform a plain sofa  with  intricate stitching and vibrant colors

Picture this: you’ve got a lovely, neutral-toned sofa in your living room. It’s comfortable, it’s classic, but it’s also a little… bland. Sound familiar? If you’re looking to give your sofa a quick and easy refresh for spring, embroidered accent cushions are the way to go!

The Power of Embroidered Cushions

Embroidered cushions have a unique ability to transform a plain sofa into a focal point. The intricate stitching and vibrant colors add depth, texture, and visual interest, instantly elevating the look of your living room. Plus, because they’re relatively small and inexpensive, you can swap them out seasonally or whenever you feel like a change.

Choosing Colors for Spring

some spring-inspired embroidered cushion designs

When selecting embroidered cushions for spring, consider colors that evoke the freshness and vitality of the season. Some great options include:

  • Soft pastels like blush pink, mint green, and sky blue
  • Vibrant hues like coral, yellow, and turquoise
  • Nature-inspired shades like leaf green, cherry blossom pink, and daffodil yellow

Don’t be afraid to mix and match colors and patterns, either! A variety of embroidered designs in complementary hues can create a delightfully eclectic look.

Styling Tips

To make the most of your embroidered cushions, keep these styling tips in mind:

  1. Odd numbers tend to look best, so aim for 3, 5, or 7 cushions on your sofa.
  2. Vary the sizes and shapes of your cushions for added visual interest.
  3. Layer embroidered cushions with solid-colored or textured ones for a balanced look.
  4. Don’t forget to fluff and rotate your cushions regularly to maintain their shape and prevent uneven wear.

With these tips in mind, you’ll be well on your way to creating a stunning, spring-ready sofa that showcases the beauty of embroidered accents.

Revitalizing Bedroom Décor with Embroidery

updating your bedroom décor with lively green and blue embroidery accents

Your bedroom should be a sanctuary – a place where you can relax, unwind, and wake up feeling refreshed. If your bedroom decor is feeling a little tired or uninspired, embroidered accents can be just the thing to breathe new life into the space.

Embroidered Bedding

The embroidered duvet covers, pillowcases, and throw blankets

One of the easiest ways to incorporate embroidery into your bedroom is through your bedding. Look for embroidered duvet covers, pillowcases, or throw blankets in spring-inspired motifs like florals, butterflies, or abstract designs. A beautifully embroidered bedspread can serve as the centerpiece of your room, setting the tone for a fresh, inviting atmosphere.

Accent Pieces

In addition to bedding, there are plenty of other ways to incorporate embroidered accents into your bedroom decor. Consider adding:

  • An embroidered throw pillow or two on your bed or armchair
  • An embroidered wall hanging or tapestry above your bed
  • Embroidered curtains or window treatments
  • An embroidered ottoman or bench at the foot of your bed
  • These accent pieces can help tie your room together and create a cohesive, polished look.
  • Color Schemes
  • When choosing embroidered accents for your bedroom, consider your existing color scheme and the overall vibe you want to create. Some popular color palettes for spring bedrooms include:
  • Soft neutrals with pops of pastel pink, green, or blue
  • Crisp white with bold, colorful embroidery
  • Monochromatic schemes featuring different shades of the same color (e.g., various hues of purple or green)
  • Remember, the key is to create a space that feels fresh, inviting, and reflective of your personal style.

Embroidered Towels for a Playful Bathroom

embroidered towel designs for your bathroom.

Who says bathrooms can’t be fun and stylish? If you’re looking to add a touch of whimsy to your bathroom this spring, embroidered towels are a fantastic option.

Choosing Designs

When selecting embroidered towels for your bathroom, look for designs that are both playful and practical. Some popular options include:

  • Floral or botanical designs
  • Cute animals or insects (think bumblebees, ladybugs, or butterflies)
  • Fruit or food-inspired designs (like lemons, strawberries, or ice cream cones)
  • Geometric or abstract patterns

Don’t be afraid to mix and match different designs, either! A variety of embroidered towels can create a delightfully eclectic look.

Styling Tips

To make the most of your embroidered towels, consider these styling tips:

  1. Fold them neatly and display them on open shelves or in a basket for easy access.
  2. Hang them on decorative hooks or towel bars for a functional and stylish display.
  3. Mix embroidered towels with solid-colored or textured ones for a balanced look.
  4. Don’t forget to rotate your towels regularly to prevent wear and tear.

With these tips in mind, you’ll be well on your way to creating a charming, spring-inspired bathroom that showcases the playful side of embroidered accents.

Conclusion

Embroidered home accents are a rising trend for spring decor, and it’s easy to see why. These charming, hand-crafted pieces add warmth, texture, and personality to any room, instantly elevating the look and feel of your space. By incorporating embroidered cushions, bedding, towels, and other accent pieces into your home, you can create a fresh, inviting atmosphere that celebrates the beauty of spring.

As you explore the world of embroidered home accents, remember to choose colors and designs that reflect your personal style and the overall vibe you want to create. Don’t be afraid to mix and match patterns, textures, and hues to create a look that’s uniquely yours.

With a little creativity and some carefully chosen embroidered pieces, you can transform your home into a spring-inspired oasis that feels both stylish and inviting. So go ahead – stitch your way to spring and enjoy the refreshing, revitalizing power of embroidered home accents!

FAQs

Q: How do I care for embroidered home accents? 
A: Most embroidered items can be machine washed on a gentle cycle with cold water and mild detergent. However, always check the care label for specific instructions, as some pieces may require hand washing or dry cleaning.

Q: Can I mix and match different embroidered designs in the same room? 
A: Absolutely! Mixing and matching different embroidered designs can create a charming, eclectic look. Just be sure to choose colors and patterns that complement each other and don’t overwhelm the space.

Q: Are embroidered home accents expensive? 
A: The cost of embroidered home accents can vary widely depending on factors like size, intricacy of the design, and brand. However, there are plenty of affordable options available at home decor stores, craft markets, and online retailers.

Q: Can I create my own embroidered home accents? 
A: Yes! If you’re feeling crafty, you can try your hand at embroidering your own cushions, towels, or other home accents. There are plenty of beginner-friendly embroidery kits and tutorials available online to help you get started.

Key Takeaways

  • Embroidered home accents are a rising trend for spring decor, adding warmth, texture, and personality to any room.
  • Embroidered accent cushions can transform a neutral sofa, using colors like soft pastels, vibrant hues, and nature-inspired shades.
  • Revitalize your bedroom decor with embroidered bedding, accent pieces, and carefully chosen color schemes.
  • Add a playful touch to your bathroom with embroidered towels featuring fun designs and patterns.
  • Mix and match embroidered designs, colors, and textures to create a unique, personalized look.
  • Care for embroidered items according to their specific care labels, and rotate them regularly to prevent wear and tear.
  • Embroidered home accents are available at various price points, and you can even create your own if you’re feeling crafty.

As we welcome the arrival of spring, there’s no better time to refresh your home decor with the charming, hand-crafted beauty of embroidered accents. From the living room to the bedroom and beyond, these versatile pieces offer endless possibilities for creating a warm, inviting atmosphere that reflects your personal style.

So why not embrace the embroidery trend this season and stitch your way to a brighter, more beautiful home? With a little creativity and some carefully chosen accents, you can transform your space into a spring-inspired oasis that feels both stylish and inviting.

As you explore the world of embroidered home decor, remember to have fun and let your personality shine through. Whether you prefer bold, vibrant designs or soft, subtle patterns, there’s an embroidered accent out there that’s perfect for you.

So go ahead – start stitching, styling, and enjoying the refreshing power of embroidered home accents. Your home (and your spirit) will thank you for it!

Bright Coral Hues: The Secret to Revitalizing Your Home Decor

Are you ready to give your home a fresh, vibrant makeover? Look no further than the latest color trend: bright coral hues! This cheerful, energetic shade has taken the interior design world by storm, and for good reason. Coral is a versatile color that can add warmth, personality, and a touch of whimsy to any space. Whether you’re a bold color enthusiast or prefer subtle pops of color, incorporating coral into your home decor is a surefire way to create a welcoming and inviting atmosphere.

What You’ll Learn

In this article, we’ll explore the many ways you can use bright coral hues to revitalize your home decor. Here’s a sneak peek at what you’ll discover:

  • How to create a stunning coral bathroom that will make your morning routine a joy
  • Ways to incorporate coral accents in your bedroom for a cozy, inviting space
  • Tips for using coral, aqua, and beige to create a fresh, beachy vibe in your living room
  • Ideas for setting a charming coral-themed kitchen table that will impress your guests
  • Strategies for incorporating coral throughout your home in a cohesive, stylish way

By the end of this article, you’ll be armed with all the knowledge and inspiration you need to confidently incorporate bright coral hues into your home decor. Get ready to fall in love with this cheerful, versatile color and watch your space come to life!

Bathroom Refresh with Coral Cabinets

Revamp your bathroom with coral-coloured cabinets

One of the most striking ways to incorporate bright coral into your home is by giving your bathroom cabinets a bold, colorful makeover. Picture this: you walk into your bathroom and are greeted by a stunning array of coral cabinets, gleaming white marble floors, and soft white walls. It’s like stepping into a refreshing oasis every time you enter the room!

To achieve this look, start by painting your bathroom cabinets a vivid shade of coral. Don’t be afraid to go bold – the brighter, the better! If you’re not ready to commit to painting all your cabinets, consider starting with a single vanity or accent cabinet to test the waters.

Contrasting Colors for a Balanced Look

When incorporating coral cabinets into your bathroom, it’s essential to balance the bold color with neutral elements. White marble floors and soft white walls provide the perfect backdrop for your coral cabinets to shine. The contrast between the warm, vibrant coral and the cool, crisp white creates a harmonious, eye-catching look that will make your bathroom feel fresh and inviting.

Lighting and Accessories

lighting and accessories. with Soft white lighting

To complete your coral bathroom refresh, pay attention to your lighting and accessories. Soft white lighting, such as a dimmer switch or frosted glass sconces, will create a gentle, flattering glow that enhances the warmth of the coral cabinets. When it comes to accessories, keep things simple and streamlined. A white ceramic soap dispenser, a plush white bath mat, and a few sprigs of greenery are all you need to accessorize your space without overwhelming the coral cabinets.

For inspiration, check out this stunning coral bathroom by Instagram user glasspaperscizzors. The combination of coral cabinets, white marble floors, and soft white walls is simply dreamy!

Bedroom Revival with Coral Accents

 subtle coral accents in your bedroom with a pop of coral to your bedding, curtains, or throw pillows

If you’re not ready to commit to a full-on coral bathroom refresh, why not start with some subtle coral accents in your bedroom? Adding a pop of coral to your bedding, curtains, or throw pillows is an easy way to inject some life into a neutral bedroom without overwhelming the space.

Coral Headboard and Matching Accents

One of the easiest ways to incorporate coral into your bedroom is by adding a vivid orange coral headboard. This statement piece will instantly become the focal point of your room, adding warmth and personality to even the most basic bedding. To tie the look together, add a matching coral knit pillow or throw blanket to your bed. The repetition of the coral hue will create a cohesive, intentional look that feels both stylish and cozy.

Mixing and Matching Patterns

Don’t be afraid to mix and match patterns when incorporating coral into your bedroom. A striped coral and white duvet cover pairs beauti

Kitchen Table Décor with Coral Tea Set

ORANGE PINK DECORATING

Who says your kitchen table has to be boring? With a few simple touches, you can transform your dining space into a charming, inviting area that’s perfect for enjoying meals with family and friends. And what better way to add a pop of color to your table than with a stunning coral tea set?

Upgrading Your Table with Coral Accents

If you have a plain wooden table, like a rustic plaid design, adding a pink coral tea set is an easy way to instantly upgrade your space. The warm, cheerful hue of the tea set will add a touch of whimsy and sophistication to your table, making even the most basic meals feel special.

To complete the look, consider adding some blush pink cushions to your dining chairs. The soft, muted pink will complement the brighter coral of the tea set, creating a cohesive, intentional look. And don’t forget the finishing touch – a vase of pale pink roses in the center of the table. The delicate flowers will add a touch of romance and elegance to your space, making every meal feel like a special occasion.

Mixing and Matching Colors and Patterns

When it comes to decorating your kitchen table, don’t be afraid to mix and match colors and patterns. A coral tea set looks stunning paired with a blue and white striped table runner or a set of floral napkins. The key is to choose colors and patterns that complement each other, rather than compete for attention.

If you’re not sure where to start, consider using a color wheel to help you choose complementary colors. Coral is a warm, orange-pink hue that pairs beautifully with cool blues and greens, as well as neutral shades like white and beige. By mixing and matching these colors in your table décor, you’ll create a space that feels both vibrant and harmonious.

Creating a Welcoming Atmosphere

The beauty of a coral tea set is that it instantly makes your kitchen table feel more welcoming and inviting. There’s something about the warm, cheerful hue that just begs you to sit down and enjoy a cup of tea with a friend. To enhance this welcoming atmosphere, consider adding some other cozy touches to your table, like a soft, plush table runner or a set of scented candles.

You can also use your coral tea set as an excuse to host a tea party or a casual brunch with friends. The cheerful, sophisticated vibe of the tea set will make even the most basic menu feel special and elevated. Plus, your guests will love the opportunity to enjoy a meal in such a charming, inviting space.

Incorporating Coral Throughout Your Home

Now that you’ve seen how coral can transform your bathroom, bedroom, living room, and kitchen, you might be wondering how to incorporate this cheerful hue throughout your entire home. The key is to use coral in small, strategic doses, rather than overwhelming your space with too much of a good thing.

Creating a Cohesive Color Scheme

One way to incorporate coral throughout your home is by creating a cohesive color scheme. Choose a few key colors that complement coral, like aqua, beige, and white, and use them in varying degrees throughout your space. For example, you might paint your living room walls a soft beige, add an aqua sofa and coral throw pillows, and then carry those same colors into your dining room with an aqua table runner and coral napkins.

By repeating the same colors throughout your home, you’ll create a sense of flow and harmony that feels both stylish and intentional. Plus, you’ll have the freedom to mix and match different coral accents throughout your space, knowing that they’ll all work together beautifully.

Adding Coral Accents to Unexpected Places

 coral accents in unexpected places.- front door

Another way to incorporate coral throughout your home is by adding coral accents to unexpected places. A coral-colored front door, for example, is a cheerful, welcoming touch that will make your home stand out from the rest. Or, consider adding a coral-colored backsplash to your kitchen for a bold, unexpected pop of color.

You can also incorporate coral into your home through smaller accents, like a coral-colored picture frame, a coral vase, or even a coral-colored candle. By sprinkling these small touches of coral throughout your space, you’ll create a sense of continuity and visual interest that feels both stylish and playful.

FAQs

Q: Can I incorporate coral into my home if I have a neutral color scheme?

A: Absolutely! Coral is a versatile color that pairs beautifully with neutral shades like white, beige, and gray

. In fact, adding a pop of coral to a neutral room can instantly make the space feel more cheerful and inviting. Try adding a coral throw pillow to a beige sofa, or hanging a coral-colored piece of artwork on a white wall. The key is to use coral as an accent color, rather than the main focus of the room.

Q: How can I incorporate coral into my home if I’m on a budget?

A: Incorporating coral into your home doesn’t have to be expensive. One of the easiest and most affordable ways to add a pop of coral to your space is through small accents, like throw pillows, vases, or candles. You can also try painting a small piece of furniture, like a side table or a picture frame, in a coral hue for a budget-friendly pop of color. And don’t forget about DIY projects – a quick search on Pinterest will reveal countless ideas for incorporating coral into your home on a budget.

Q: What if I get tired of the coral trend? Is it easy to switch out coral accents?

A: One of the best things about incorporating coral into your home through small accents is that it’s easy to switch them out if you get tired of the trend. If you invest in a few key coral pieces, like throw pillows or a tea set, you can easily swap them out for new accents in a different color when you’re ready for a change. And if you’ve painted a piece of furniture or a wall in a coral hue, you can always repaint it in a new color when you’re ready to move on.

Key Takeaways

  • Coral is a versatile, cheerful color that can instantly revitalize any room in your home.
  • Incorporating coral into your bathroom, bedroom, living room, and kitchen is easy with a few key accents, like throw pillows, tea sets, and artwork.
  • When incorporating coral into your home, balance it with neutral shades and complementary colors, like aqua and beige, to create a cohesive look.
  • Don’t be afraid to mix and match patterns and textures when incorporating coral into your home – the key is to choose designs that share the same coral hue.
  • Coral accents can be easily switched out if you get tired of the trend, making it a low-risk way to experiment with bold color in your home.

Conclusion

Incorporating bright coral hues into your home decor is a fun, easy way to add a pop of color and personality to your space. Whether you’re looking to create a bold statement with coral bathroom cabinets or simply add a few cheerful accents to your bedroom or living room, this versatile hue is sure to make your home feel more inviting and vibrant.

So what are you waiting for? Embrace the coral trend and start incorporating this cheerful hue into your home today! With a few key accents and a little bit of creativity, you’ll be well on your way to creating a space that feels both stylish and inviting. Happy decorating!

9 Essential Garden Tasks for a Thriving May Garden

0

May is a month that every gardener looks forward to with great anticipation. The weather is just right – not too hot, not too cold – making it the perfect time to roll up your sleeves and dive into some essential garden tasks. Whether you’re a seasoned green thumb or a novice just starting out, tackling these 9 essential garden tasks in May will set your garden up for a thriving summer season.

What You’ll Learn

In this article, we’ll cover the following essential May gardening tasks:

  1. Planting a variety of flowers for a colorful and vibrant garden
  2. Thinning out fruit trees for healthier, more productive harvests
  3. Establishing an early morning watering schedule to prevent evaporation and fungal growth
  4. Applying mulch effectively to retain moisture, suppress weeds, and regulate soil temperature
  5. Implementing natural pest control methods for a safer, more eco-friendly garden
  6. Aerating and dethatching warm-season lawns for better water penetration and nutrient absorption
  7. Creating an herb garden for fresh, flavorful ingredients and the satisfaction of growing your own produce
  8. Experimenting with exotic fruits to add variety and excitement to your garden
  9. Conducting regular garden maintenance tasks to keep your garden healthy, happy, and looking its best

But why is May such a crucial month for gardening? Well, it’s all about timing. As the saying goes, “April showers bring May flowers,” and that’s not just a cute rhyme – it’s the truth! The combination of warmer temperatures and ample moisture in the soil creates the ideal conditions for plants to flourish.

However, it’s not just about letting nature take its course. As a gardener, you play a vital role in ensuring your garden reaches its full potential. That’s where these 9 essential garden tasks come in. From planting a variety of flowers to implementing natural pest control methods, each task is designed to give your garden the TLC it needs to thrive.

Now, I know what you might be thinking: “9 tasks? That sounds like a lot of work!” And you’re right, it can be. But here’s the thing – gardening is a labor of love. There’s something incredibly rewarding about getting your hands dirty and watching your hard work bloom into a beautiful, bountiful garden.

Plus, breaking it down into manageable tasks makes it feel much less overwhelming. Take it from me, a self-proclaimed procrastinator who once let my garden turn into a jungle of weeds because I kept putting off the essential tasks. Trust me, it’s much easier to tackle them bit by bit than to face a garden apocalypse later on!

So, are you ready to dive in and discover the 9 essential garden tasks for a thriving May garden? Grab your gloves, your trowel, and maybe even a cup of coffee (I won’t judge if you spike it with a little something extra – gardening can be thirsty work!), and let’s get started.

Task 1: Plant a Variety of Flowers

One of the most exciting parts of gardening in May is getting to plant a whole bunch of gorgeous flowers. It’s like giving your garden a colorful makeover! But with so many options out there, it can be tough to know where to start. Don’t worry, though – I’ve got you covered.

First up, let’s talk about annuals. These are the flowers that only last for one growing season, but boy, do they pack a punch! Some of the best annuals to plant in May include:

  • Begonias: These beauties come in a range of colors and can handle a bit of shade, making them a versatile choice.
  • Chrysanthemums: Mums are a classic fall flower, but did you know you can plant them in May for a head start on the season?
  • Geraniums: With their bright, cheerful blooms, geraniums are a must-have in any May garden.
  • Marigolds: Not only do marigolds add a pop of yellow or orange to your garden, but they also help repel pests!
  • Petunias: These low-maintenance flowers come in a variety of colors and patterns, so you can mix and match to your heart’s content.
  • Verbenas: Trailing verbenas are perfect for hanging baskets or as a groundcover in your garden beds.

But why stop at annuals? Perennials are the gift that keeps on giving, coming back year after year to bring joy to your garden. Some fantastic perennials to plant in May include:

  • African Daisies: These bright, cheerful flowers are drought-tolerant and perfect for sunny spots.
  • Delphiniums: With their tall spikes of blue, purple, or white flowers, delphiniums add a touch of elegance to any garden.
  • Fuchsias: These unique flowers come in a range of colors and are perfect for hanging baskets or as a focal point in your garden beds.
  • Lavender: Not only does lavender add a beautiful pop of purple to your garden, but it also smells amazing and attracts pollinators.

When planting your flowers, be sure to choose a spot that gets the right amount of sun for each variety. Some flowers, like begonias and fuchsias, prefer a bit of shade, while others, like marigolds and petunias, thrive in full sun. And don’t forget to give them plenty of water and fertilizer to help them grow strong and healthy!

Planting a variety of flowers in May is a surefire way to create a garden that’s bursting with color and life. So go ahead and get creative – mix and match your favorite annuals and perennials to create a garden that’s uniquely you!

Task 2: Thin Out Fruit Trees

Alright, let’s talk about fruit trees. If you’re lucky enough to have some in your garden, you might have noticed that they’re starting to bear fruit by now. And while it’s tempting to let all those adorable little fruits grow big and juicy, there’s an important task you need to tackle first: thinning.

Now, I know what you’re thinking. “But why would I want to get rid of perfectly good fruit?” Well, hear me out. Thinning out the smaller or excess fruit, especially on younger trees, is crucial for a few reasons.

First of all, it allows the remaining fruit to grow bigger and healthier. When a tree has too much fruit, it spreads its resources thin, trying to nourish all of them at once. By removing some of the fruit, you’re allowing the tree to focus its energy on the remaining ones, resulting in larger, juicier, and more flavorful fruit.

Secondly, thinning helps prevent damage to the tree itself. When branches are weighed down by too much fruit, they can break or become severely damaged. This not only looks unsightly but can also make the tree more susceptible to disease and pests.

So, how do you go about thinning your fruit trees? It’s actually pretty simple. Just follow these steps:

  1. Wait until the fruit is about the size of a dime or a nickel.
  2. Use clean, sharp pruning shears to remove the excess fruit, leaving about 4-6 inches of space between each remaining fruit.
  3. Focus on removing any damaged, misshapen, or small fruits first.
  4. If you have a heavy crop, you may need to do a second thinning later on.

I know it can be tough to remove all that perfectly good fruit, but trust me – your taste buds (and your trees!) will thank you later. Plus, think of it this way: by thinning out the fruit now, you’re ensuring an even better harvest in the future.

So go ahead and give your fruit trees a little TLC this May. It might feel like a bit of a chore, but the end result is so worth it. And hey, if you end up with a surplus of fruit down the line, you can always share the wealth with your neighbors or whip up a delicious pie or cobbler. It’s a win-win!

Task 3: Maintain an Early Morning Watering Schedule

Watering your garden may seem like a no-brainer, but there’s actually a bit of a science to it. And one of the most important things to keep in mind is timing. Believe it or not, the time of day you water your plants can make a big difference in their health and growth.

So, what’s the best time to water your garden? Drumroll please… early morning! Yep, setting your alarm a little earlier to give your plants a drink can work wonders. Here’s why:

  1. Evaporation: Watering in the early morning gives your plants plenty of time to absorb the moisture before the heat of the day kicks in and causes the water to evaporate.
  2. Fungal growth: Watering at night can actually promote fungal growth, as the moisture sits on the leaves for longer periods without the sun to dry it out. By watering in the morning, you give the plant time to dry out before nightfall.
  3. Heat stress: Watering during the hottest part of the day can actually shock your plants, causing them to wilt or even suffer from heat stress. By watering in the morning, you’re giving them a nice, cool drink to help them withstand the heat to come.

Now, I know what you might be thinking. “But I’m not a morning person! Can’t I just water them whenever I feel like it?” Well, sure, you could. But if you want your garden to really thrive, it’s worth setting that alarm a little earlier and making it a habit.

Plus, there’s something really peaceful and satisfying about watering your garden in the early morning hours. The world is still quiet, the birds are just starting to sing, and you get to start your day off by nurturing something beautiful. It’s like a little moment of zen before the chaos of the day begins.

So, how much should you water your plants? A good rule of thumb is to give them about an inch of water per week, adjusting as needed based on rainfall and temperature. And don’t forget to water deeply, so the moisture reaches the roots where it’s needed most.

If you’re not sure whether your plants need water, just stick your finger about an inch into the soil. If it feels dry, it’s time to water. If it’s still moist, you can probably hold off for a bit.

Maintaining an early morning watering schedule may take a little getting used to, but trust me – your garden will thank you for it. And who knows, you might just find that you enjoy those quiet morning moments with your plants. Just don’t forget the coffee!

Task 4: Apply Mulch Effectively

Mulch: it’s not just a funny-sounding word, it’s also a gardener’s best friend. But what exactly is mulch, and why is it so important? Simply put, mulch is a layer of material (usually organic) that you spread over the surface of your soil. It can be made from things like bark, leaves, straw, or even compost.

Now, I know what you might be thinking. “Why would I want to cover up my beautiful soil with a bunch of dead leaves?” But trust me, mulch is like a superhero for your garden. Here are just a few of the benefits:

  1. Moisture retention: Mulch acts like a protective blanket over your soil, helping it retain moisture and reducing the need for frequent watering.
  2. Weed suppression: By blocking out light and creating a physical barrier, mulch helps prevent weeds from taking over your garden.
  3. Erosion control: Mulch helps keep your soil in place, preventing it from washing away during heavy rains or irrigation.
  4. Temperature regulation: In the summer, mulch helps keep your soil cool and moist. In the winter, it can help insulate your plants’ roots from freezing temperatures.
  5. Nutrient boost: As organic mulches break down, they release nutrients into the soil, giving your plants a little extra food.

Sold on the benefits of mulch? Great! Now, let’s talk about how to apply it effectively.

First, you’ll want to choose the right type of mulch for your garden. If you’re mulching around trees and shrubs, bark mulch is a great choice. For vegetable gardens and flower beds, straw or compost can work well.

Next, you’ll want to apply the mulch at the right depth. A good rule of thumb is to aim for a layer that’s about 3 inches deep. This will give you all the benefits of mulch without smothering your plants.

When applying the mulch, be sure to leave a little space around the base of your plants. You don’t want the mulch touching the stems or trunks, as this can trap moisture and lead to rot.

Finally, don’t forget to replenish your mulch as needed throughout the growing season. As it breaks down, you may need to add a fresh layer to keep your garden looking and feeling its best.

Applying mulch may not be the most glamorous garden task, but it’s definitely one of the most important. So go ahead and give your garden the superhero treatment it deserves – your plants (and your back!) will thank you for it.

Task 5: Implement Natural Pest Control Methods

Picture this: you’re out in your garden, admiring the fruits (and vegetables) of your labor, when suddenly you spot it. A tiny, slimy creature making its way towards your prized tomato plant. Or maybe it’s a swarm of tiny, flying insects descending on your rose bushes like a scene from a horror movie. Either way, your first instinct might be to reach for the nearest can of chemical pesticide and go to town.

But wait! Before you unleash a barrage of toxic chemicals on your garden, consider this: there are plenty of natural pest control methods that can be just as effective (if not more so) than their synthetic counterparts. Not only are they better for the environment, but they’re also safer for you, your family, and your pets.

So, what are some of these natural pest control methods? Here are a few of my favorites:

  1. Companion planting: Some plants have natural pest-repelling properties, making them great companions for other plants. For example, planting marigolds near your tomatoes can help keep aphids and other pests at bay.
  2. Neem oil: This natural oil, derived from the neem tree, has been used for centuries as a natural pesticide. It works by disrupting the life cycle of pests, preventing them from reproducing and feeding on your plants.
  3. Ladybugs: These cute little beetles are actually voracious predators when it comes to aphids and other soft-bodied pests. You can attract them to your garden by planting things like dill, fennel, and yarrow.
  4. Diatomaceous earth: This fine powder, made from the fossilized remains of algae, works by dehydrating and killing soft-bodied pests like slugs and snails. Just sprinkle it around the base of your plants and let it do its thing.
  5. Hand-picking: Sometimes, the best pest control method is the simplest. If you spot a few pests on your plants, just pick them off by hand and drop them into a bucket of soapy water.

Of course, these are just a few examples – there are plenty of other natural pest control methods out there, from using garlic spray to planting trap crops. The key is to be proactive and stay vigilant, keeping a close eye on your plants and addressing any pest issues before they get out of hand.

And remember, not all bugs are bad! In fact, many of them (like ladybugs, lacewings, and praying mantises) are actually beneficial for your garden, helping to keep pest populations in check. So before you start squashing every bug in sight, take a moment to identify it and determine whether it’s friend or foe.

Implementing natural pest control methods may require a bit more effort than just spraying some chemicals and calling it a day, but the benefits are well worth it. Not only will you have a healthier, more vibrant garden, but you’ll also be doing your part to protect the environment and support a more sustainable way of gardening. So go ahead and give it a try – your plants (and the planet) will thank you!

Task 6: Aerate and Dethatch Warm Season Lawns

Ah, the Great American Lawn. For some, it’s a source of pride and joy – a lush, green carpet that’s the envy of the neighborhood. For others, it’s a never-ending chore, a battle against weeds, bare spots, and brown patches. But whether you love it or loathe it, there’s no denying that a healthy lawn takes work. And one of the most important tasks you can tackle in May is aerating and dethatching your warm season grass.

Now, I know what you might be thinking. “Aerate? Dethatch? Aren’t those just fancy words for poking holes in my lawn and raking up dead grass?” Well, yes and no. While those are certainly part of the process, there’s a bit more to it than that.

Let’s start with aeration. Essentially, aeration involves creating small holes in your lawn to allow air, water, and nutrients to penetrate the soil more easily. This is especially important for warm season grasses like Bermuda, Zoysia, and St. Augustine, which tend to develop thick layers of thatch over time.

Thatch, in case you’re not familiar, is that layer of dead grass and roots that builds up between the soil and the living grass blades. A little bit of thatch is actually beneficial, helping to insulate the soil and retain moisture. But when it gets too thick (usually more than half an inch), it can start to cause problems.

That’s where dethatching comes in. Dethatching involves using a special rake or machine to remove excess thatch from your lawn, allowing water and nutrients to penetrate more easily. It also helps prevent issues like fungal growth and pest infestations, which can thrive in thick, damp thatch.

So, how do you go about aerating and dethatching your lawn? Well, you have a few options. For smaller lawns, you can use a manual aerator (which looks like a giant fork) or a dethatching rake. For larger lawns, you might want to consider renting a power aerator or dethatcher from your local hardware store.

When aerating, be sure to go over your entire lawn, creating holes about 2-3 inches deep and 2-4 inches apart. If you’re using a manual aerator, you’ll want to put some muscle into it – those cores of soil can be tough to extract! If you’re using a power aerator, be sure to follow the manufacturer’s instructions carefully.

For dethatching, you’ll want to set your rake or machine to remove about half an inch of thatch at a time. Be careful not to go too deep, as you don’t want to damage the living grass or the soil beneath. And be prepared for a bit of a workout – dethatching can be a bit of an arm burner!

Once you’ve finished aerating and dethatching, give your lawn a good watering and consider applying a bit of fertilizer to help it recover. And don’t be alarmed if your lawn looks a bit rough for a week or two afterwards – it’s just taking some time to bounce back.

Aerating and dethatching your warm season lawn may not be the most glamorous of garden tasks, but it’s definitely one of the most important. By taking the time to give your grass a little TLC in May, you’ll be setting yourself up for a lush, healthy lawn all summer long. And who knows – you might even find yourself starting to enjoy those early morning mowing sessions. (Well, maybe not, but a gardener can dream!)

Task 7: Establish an Herb Garden

There’s something magical about stepping outside your kitchen door and plucking a few fresh sprigs of herbs to add to your favorite dishes. The aroma, the flavor, the satisfaction of knowing you grew them yourself – it’s enough to make even the most reluctant gardener want to get their hands dirty. And the good news is, establishing an herb garden is actually one of the easiest (and most rewarding) gardening tasks you can tackle in May.

First things first: let’s talk location. Most herbs thrive in full sun, so you’ll want to choose a spot that gets at least six hours of direct sunlight per day. If you’re short on space, don’t worry – herbs are perfect for container gardening, so you can easily grow them on a balcony, patio, or even a sunny windowsill.

Once you’ve chosen your location, it’s time to pick your herbs. Some of the easiest (and most versatile) herbs to grow include:

  • Basil: This fragrant herb is a staple in Italian and Thai cuisine, and it’s super easy to grow from seed or transplants.
  • Chives: These mild, onion-flavored herbs are perfect for adding a subtle kick to salads, soups, and more.
  • Cilantro: Love it or hate it, there’s no denying that cilantro adds a unique flavor to Mexican and Southeast Asian dishes.
  • Dill: This feathery herb is a must-have for pickling, but it’s also great in salads, dips, and more.
  • Mint: Whether you prefer spearmint, peppermint, or chocolate mint, this refreshing herb is a must-have for summer drinks and desserts.
  • Oregano: This bold, earthy herb is a staple in Mediterranean and Mexican cuisine, and it’s incredibly easy to grow.
  • Parsley: Whether you prefer flat-leaf or curly parsley, this versatile herb is a must-have for garnishes, salads, and more.
  • Rosemary: This fragrant, woody herb is perfect for roasted meats, potatoes, and more.
  • Sage: This earthy herb is a must-have for Thanksgiving stuffing, but it’s also great in soups, stews, and more.
  • Thyme: This delicate herb is a staple in French cuisine, but it’s also great in marinades, rubs, and more.

When planting your herbs, be sure to use a well-draining potting mix and choose containers with adequate drainage holes. Most herbs don’t like to sit in soggy soil, so err on the side of underwatering rather than overwatering.

As your herbs grow, don’t be afraid to harvest them regularly. In fact, regular pruning can actually help your herbs grow bushier and more flavorful. Just be sure to leave enough leaves on the plant to allow it to continue photosynthesizing and growing.

One word of caution: some herbs (like mint and lemon balm) can be a bit invasive, spreading quickly and taking over your garden if you’re not careful. If you’re planting these herbs, consider using a separate container or planting them in a buried pot to keep them contained.

Establishing an herb garden is not only a fun and rewarding gardening task, but it’s also a great way to add fresh, flavorful ingredients to your cooking. Plus, there’s something so satisfying about stepping outside and snipping a few sprigs of herbs that you grew yourself. So go ahead and give it a try – your taste buds (and your green thumb) will thank you!

Task 8: Experiment with Exotic Fruits

Alright, folks, it’s time to get a little adventurous in the garden! While there’s certainly nothing wrong with sticking to tried-and-true favorites like apples, peaches, and plums, why not mix things up this year and try your hand at growing some exotic fruits?

Now, I know what you might be thinking. “Exotic fruits? In my garden? Isn’t that a little…crazy?” And sure, it might sound a bit daunting at first. But hear me out – not only are exotic fruits incredibly delicious and nutritious, but they’re also a great way to add some variety and excitement to your garden.

So, what exactly do I mean by “exotic fruits”? Well, basically anything that’s not your typical grocery store fare. Think tropical delights like:

  • Bananas: Believe it or not, it’s actually possible to grow bananas in some parts of the US, especially if you live in a warm, humid climate like Florida or Hawaii.
  • Pineapples: These spiky, sweet fruits are surprisingly easy to grow, and they make a stunning addition to any garden.
  • Guava: With their sweet, musky flavor and tender, edible seeds, guavas are a true tropical treat.
  • Mango: These juicy, colorful fruits are packed with vitamins and antioxidants, and they’re easier to grow than you might think.
  • Papaya: With their buttery, sweet flesh and tropical aroma, papayas are a must-try for any adventurous gardener.
  • Passion fruit: These tart, tangy fruits may be small, but they pack a serious flavor punch.
  • Dragon fruit: Also known as pitaya, these stunning, hot pink fruits are actually a type of cactus, and they’re surprisingly easy to grow.

Of course, the key to successfully growing exotic fruits is to do your research and choose varieties that are well-suited to your climate and growing conditions. Some fruits (like bananas and guava) may require a bit more warmth and humidity than others, while others (like passion fruit and dragon fruit) are surprisingly cold-tolerant.

When choosing a spot to plant your exotic fruits, look for a location that gets plenty of sunlight and has well-draining soil. Many tropical fruits also benefit from a bit of extra humidity, so consider planting them near a water source or misting them regularly.

As your fruits begin to grow and ripen, be sure to keep an eye out for pests and diseases, and take steps to address any issues as soon as they arise. And don’t be afraid to experiment with different varieties and growing techniques – part of the fun of gardening is learning as you go!

Of course, growing exotic fruits isn’t just about the end result – it’s also about the journey. There’s something incredibly rewarding about watching a tiny seedling grow into a thriving, fruit-bearing plant, and knowing that you played a part in making it happen.

So go ahead and give it a try – your taste buds (and your sense of adventure) will thank you. And who knows – you might just discover a new favorite fruit that you never would have tried otherwise. Happy planting!

Task 9: Conduct Regular Garden Maintenance

Gardening is a lot like life – it’s full of ups and downs, twists and turns, and plenty of unexpected surprises along the way. But just like anything worth doing, the key to success is consistency and regular maintenance.

Now, I know what you might be thinking. “Maintenance? That sounds like a lot of work!” And sure, it’s not always the most glamorous part of gardening. But trust me – a little bit of regular TLC can go a long way towards keeping your garden healthy, happy, and looking its best.

So, what exactly does “regular garden maintenance” entail? Well, it can vary depending on the size and type of garden you have, but here are a few key tasks to keep in mind:

  1. Weeding: Let’s face it – weeds are the bane of every gardener’s existence. But the longer you let them go, the harder they are to get rid of. Make a habit of spending a few minutes each day (or at least a few times a week) pulling weeds by hand or using a hoe or other tool to keep them at bay.
  2. Pruning: Just like us, plants sometimes need a little haircut to keep them looking their best. Regularly pruning dead or diseased leaves and stems not only keeps your plants looking tidy, but it also helps prevent the spread of disease and encourages healthy new growth.
  3. Deadheading: Speaking of pruning, deadheading (aka removing spent blooms) is another important maintenance task that can help keep your plants looking their best. Not only does it tidy up the plant, but it also encourages the plant to produce more blooms.
  4. Watering: We’ve already talked about the importance of maintaining a regular watering schedule, but it’s worth mentioning again. Make sure your plants are getting the right amount of water (not too much, not too little) and adjust as needed based on weather conditions and the specific needs of each plant.
  5. Fertilizing: Just like us, plants need food to thrive. Regularly fertilizing your plants (following the instructions on the package, of course) can help keep them healthy and vibrant, and ensure that they have all the nutrients they need to grow and bloom.
  6. Pest control: We’ve also already talked about the importance of natural pest control methods, but it’s worth keeping an eye out for any signs of infestation and addressing them quickly. Regular inspections and prompt action can help keep pests from getting out of hand and damaging your plants.
  7. Cleaning up: Finally, don’t forget the importance of regular cleanup in the garden. Removing dead leaves, spent blooms, and other debris not only keeps your garden looking tidy, but it also helps prevent the spread of disease and pests.

Now, I know that all of this might sound like a lot of work – and it’s true, gardening does require a certain level of commitment and effort. But here’s the thing – it’s also incredibly rewarding. There’s something so satisfying about watching your hard work pay off in the form of healthy, vibrant plants and a beautiful, thriving garden.

Plus, regular maintenance tasks can actually be quite meditative and relaxing. There’s something about getting your hands dirty and spending time in nature that just feels good for the soul. And who knows – you might even start to look forward to your daily weeding sessions as a chance to unplug and unwind.

So go ahead and embrace the joys (and yes, sometimes the challenges) of regular garden maintenance. Your plants will thank you – and so will your mental health! Happy gardening, my friends.

FAQs

  1. Q: How often should I water my garden?
    A: As a general rule, most gardens need about an inch of water per week, either from rainfall or watering. However, this can vary depending on factors like soil type, climate, and the specific needs of your plants. The best way to tell if your plants need water is to stick your finger about an inch into the soil – if it feels dry, it’s time to water.
  2. Q: What’s the best way to get rid of weeds?
    A: The best way to get rid of weeds is to pull them by hand or use a hoe or other tool to remove them from the soil. Avoid using chemical herbicides, as these can harm beneficial insects and other wildlife. For tough weeds, you can also try using a natural weed killer like vinegar or boiling water.
  3. Q: How do I know if my plants need fertilizer?
    A: Most plants benefit from regular fertilization, especially during the active growing season. Signs that your plants may need fertilizer include slow growth, yellowing leaves, or small or weak blooms. However, be careful not to over-fertilize, as this can actually harm your plants. Always follow the instructions on the fertilizer package carefully.
  4. Q: What’s the best way to prevent pests in my garden? A: The best way to prevent pests in your garden is to use natural pest control methods like companion planting, handpicking, and using natural predators like ladybugs and praying mantises. Regularly inspecting your plants for signs of pests and addressing any issues quickly can also help prevent infestations from getting out of hand.
  5. Q: How often should I prune my plants?
    A: The frequency of pruning depends on the specific plant and its growth habits. Some plants, like herbs and certain flowers, benefit from regular pruning to encourage bushier growth and prevent legginess. Others, like trees and shrubs, may only need pruning once a year or even less frequently. As a general rule, it’s best to prune most plants in late winter or early spring, before new growth begins.
  6. Q: How can I tell if my soil is healthy? A: Healthy soil is essential for a thriving garden. Some signs of healthy soil include a rich, dark color, a crumbly texture, and plenty of earthworms and other beneficial organisms. You can also do a simple soil test using a home testing kit or by sending a sample to your local cooperative extension office. This can help you identify any nutrient deficiencies
    or imbalances that may need to be addressed.

    7. Q: What’s the best way to attract pollinators to my garden?
    A: Pollinators like bees, butterflies, and hummingbirds are essential for a healthy and productive garden. To attract these beneficial creatures, plant a variety of native flowers that bloom throughout the growing season. Some great options include wildflowers, herbs like lavender and thyme, and flowering shrubs like butterfly bush and bee balm. You can also provide additional resources like a shallow water source or a bee hotel to encourage pollinators to stick around.

Whew, we made it! We’ve covered a lot of ground in this article, from planting colorful flowers and thinning out fruit trees to experimenting with exotic fruits and embracing the joys of regular garden maintenance.

Conclusion

Gardening can sometimes feel overwhelming, especially when you’re faced with a long list of tasks and chores. But here’s the thing – it’s also one of the most rewarding and satisfying hobbies you can pursue. There’s something truly magical about planting a tiny seed or seedling and watching it grow into a beautiful, thriving plant that provides you with food, beauty, and joy.

So if you’re feeling a bit daunted by all the tasks ahead, just remember – you’ve got this! Take it one step at a time, and don’t be afraid to ask for help or advice when you need it. And above all, remember to have fun and enjoy the process. Gardening is a journey, not a destination, and every step along the way is an opportunity to learn, grow, and connect with the natural world around you.

So go ahead and get out there – plant some flowers, thin out those fruit trees, and experiment with some exotic fruits. Embrace the challenges and the triumphs, the dirt under your fingernails and the sun on your face. And most of all, enjoy the incredible sense of pride and satisfaction that comes from knowing that you played a part in creating something beautiful and nourishing.

Happy gardening, my friends! May your gardens be bountiful, your harvests plentiful, and your hearts full of joy and wonder at the incredible magic of nature.

Spring Cleaning Tips

0
  Spring cleaning season is upon us. Some of us dread the thought of cleaning and organizing, while others thrive off the idea. Here are a few tips to make your spring cleaning easier and more efficient. Makeup Makeup is an item that naturally gets cluttered and very, very messy. To keep things organized during your spring cleaning, throw away expired makeup. A helpful tip is to write on the product the date you opened it so you know exactly how old it is. Closet This is the area most of us need help in. Everyone gets attached to their clothing. During your spring cleaning, think about how many times you wore an item. If it’s been over a year, toss it. If it’s out of style, toss it. If you don’t feel any personal attachment to it, toss it. To make things look neat and organized, colour-coordinate your clothes and roll them in your drawers so you can see everything you own. De-clutter We all have things we definitely do not need. Studies show that a messy home leads to increased stress levels. Clean through your drawers to have a more relaxed mind. Clean your cleaners Most of us neglect this step! The cleaners too, need to be cleaned. Change the filter on your vacuum, clean the bristles, vacuum the ends of your broom to get rid of dust, and of course disinfect them. Make a list Spring cleaning can be overwhelming because it seems like you have 101 things to do and clean, but putting it down on paper can make it easier to know where to start. List everything you want done and begin checking them off one by one.

Should You Rent a Skid with an Operator?

0

Skid steers are important, earth moving machines used for landscaping and a lot of other functions that involve moving the earth and digging up land. They are mostly used at construction sites for lighter jobs so it is not something that you might have stored in your garage or shed.

Skid steers are quite expensive, but you can always rent one for your projects from Skid steer rental, especially if you only need it for a one-time project. Like any other machine used at such site, you need specialized knowledge to operate this machine. Since this is not something you can learn at a whim, it is important that you hire one with an operator. Here is why you should do that.

Skill and Experience

In any project, a skilled and experienced individual will do a better and a clinical job than armatures or do-it-yourself individuals. Skid steers operations are no different. Digging, scooping, and carrying heavy loads with this machine is not such a simple task. You need an operator since they already know the controls and know what to use to carry out a particular function. As an armature, you might end up messing your work environment instead of getting the job done.

Save Time

Projects have deadlines that must be achieved. If you do not know how to operate a skid steer, you will waste a lot of time trying to learn the controls and then finally using the operator without any guidance. This process may hinder the progress of your project and delay it a great deal. You can save yourself from all these by just hiring a machine that comes with its operators. You will save a lot of time since the operator comes prepared to accomplish his tasks. You only need to give basic instructions to the operator and wait to see your land being leveled up.

Safety

Safety is paramount when using these machines. As mentioned, it requires experience and skill to operate this machine. Without such, you and the people around the site may be exposed to fatal danger. It is possible to run over other people considering the speed at which this machine moves with. As an operator, you can get trapped within the machine parts or even have a heavy load fall over you. A skilled operator is adept or conversant with the controls inside this machine. These operators will significantly reduce the risks associated with these machines.

Regulations

In some states, skid operators must be licensed to operate these machines. Such machines are not your everyday automobiles that one can just get into and operate. They are complex machines that require specialized handling by professionals specifically trained for this purpose. You can be arrested and charged if found operating such a machine without the qualification. If you are in such a state, it is better to get one with an operator rather than hire one without then start the tedious process of trying to get a good operator. If you get one from the company, they will most likely give you a qualified one.

Seasonal Spring Flowers For The Garden

0

Seasonal Spring Flowers For The Garden – Which flowers are in season during the spring depends greatly on your climate zone and weather conditions. In warmer areas the earliest flowers will show their color before winter wheezes its last breath. The most prominent spring flowers are those that come from bulbs. They arrive in wonderfully pastel colors from the first pure white snowdrops to low growing lilac, mauve or yellow crocuses, closely followed by delicate cyclamens, sometimes showing through a skiff of snow.

By early spring, depending again on the growing zone, sunny yellow daffodils, or narcissus, have presented their welcome heads. They range in color from a deep yellow to paper white with yellow centers. They are closely followed by other bulbs including anemones whose common name is wind flowers. These are showy with generally red heads and black center but can be purple, light pink, white or blue. Anemones are actually a herb and have a romantic history. They mean ‘forsaken’. Stalks of purple grape hyacinths not only add color to which flowers are in season during the spring, but they add a wonderful fragrance.

Tulips, a popular and colorful addition to any garden, do well in almost every climate zone. They come in many bright colors and are very hardy. Stalks and blooms can be low to the ground or taller and more upright. By May they should be in full bloom. The iris arrive and the garden comes alive with a rainbow of glory. Iris plants were actually named after ‘Iris’ the Greek Goddess of the Rainbow. Their fragrance and beauty is unrivaled.

Among the perennial flowers that are early spring bloomers include dianthus, a frill edged bloom that ranges from pale pink to dark pink. Salvia, a spiky, tall bloomer is part of the mint family of herbs. Sea thrift, sometimes known as sea pink makes an early cutting flower for the spring bouquet and the unbranched bright clumps of Lungwort bring life to the early perennial garden.

Which flowers are in season during the spring is, of course, governed by which you plant. Early annuals that will bring quick color are the every popular Impatiens. They grow rapidly and bloom profusely. For delicate color under shrubs or taller plants the shy Viola makes a nice presentation. For nonstop action in your spring and early summer garden geraniums win hands down. They come in varied colors, their large heads inviting your line of vision. They are hardy and require little care except a daily ‘deadheading’ or pulling off dying blooms. Petunias is an old fashioned favorite that adds special charm to the cool weather garden, although they will bloom throughout the season when provided the right sun exposure. New breeds of Petunias have been introduced over the years including the wave petunia, a vine variety that works well in hanging pots. For cutting flowers remember to plant Bachelor Buttons and traditional snapdragons. Gypsophila, or pure white Baby’s-breath is a must for texture in the garden and accent in flower arrangements.

Home Decor Trends 2019

0

Photo: https://www.instagram.com/muk.vl/

Minimalism

A big trend right now is minimalism and the idea that less is more. You don’t need a crazy patterned rug or the trendiest couch for a gorgeous room. Sometimes simplicity is key and this year, it is. Neutrals with the necessary furniture is just perfect.

Photo: https://www.instagram.com/p/BtQH5C8AwQL/

Floral Wallpaper

Can easily add a gorgeous touch to a room whether it be a neutral colour or a bright one. Perfect for an accent wall, or if you dare, an entire room.

Photo: https://www.homedit.com/geometric-designs/geometric-table-lamp-base/

Geometrics

From light fixture’s to patterned rugs and everything in between, geometric shapes in the home are an ongoing trend that break up any plainness in a room. They add uniqueness and a point of differentiation.

Photo: https://www.kathykuohome.com/blog/mixing-metals-the-dos-and-donts/

Mixing Metals

An intended contrast in a room makes all the difference. Think: the Kitchen. Metal knobs to the cabinets with a different type of metal bar stools or sink fixtures. It’s a very cool look.

Photo: https://homishome.com/wp-content/uploads/2018/07/Lovely-Colourful-Sofa-Ideas-10.jpg

Velvet

Velvet will be much more popular this year than previous years. The texture is comfortable and looks gorgeous in various colours. It used to be considered ‘old fashioned’, but is now seen as luxurious and bold.


Creative Ways to Upgrade Your Beautiful Backyard

0

Not all the people are lucky enough to have a backyard in their house; even if it is a small space you can make this place full of celestial beauty using backyard upgrading tool.

A beautiful green backyard helps you to stay fresh. Passing time there in the morning and evening is really mind-soothing. It works like an anti-depressive agent – when you keep yourself in a touch of nature it protects you from being attacked by depression.

To arrange a family party or to remove the tiredness from your body and mind after a long tiring day a beautiful backyard is the best option. Check out the Tools Freak to find out more about garden improvement projects and tools.

Sometimes people cannot implement the organized idea and finally, the backyard becomes a bush, so here we have brought some creative ideas for upgrading your beautiful backyard.

10 Creative ideas to Decorate Your Backyard

  1. Eliminate the Unused Stuff

The first task is to make the area free from unused stuff so that you can get enough space and implement the backyard upgrading ideas easily.

Gather the unused pile of kids’ bikes, gardening tools, or extra plant pots and sell or give away this stuff. If you think that you need some products, you can store these for future use but store these in an organized way.

  1. Prepare the Backyard for Planting

To prepare the backyard for planting flower plants, vegetables or other decorative plants pull up dead bushes, weeds and trim overgrown shrubs. You can use spades, rakes, hoes, trowels and many more garden tools for this purpose.

Always keep a good distance from one plant to another, otherwise, when the plant will grow up it will create a bush.

  1. Choose Plants Wisely

While choosing plants for your backyard tries to choose plants of multiple types. The same type of plants will make the environment monotonous.

The type of plant you will choose for your backyard depends on the type of soil, the entrance of sunlight and many more factors. Well, here I am not going to describe all of these factors in detail but I would like to give you a tip to make your garden a celestial place.

Pay attention to the color of the flowers or plants you are going to plant. It is better to make a combination of both colorful and white or green flowers or plants because both of these have a different impact on your mind.

While colorful flowers help to bring a feeling of joy white flowers to help to bring a feeling of peace and tranquility in your mind. For a healthy mental condition, you need both. Also, do not forget to add some fragrant flower plants to decorate your backyard.

  1. Invest in Lighting

Lighting is another important factor that has a strong impact on the outdoor ambiance of your house. It is better to install stair lights since they meet both security and aesthetic needs. On the back entrance, you can install a gooseneck light that will give a wonderful downward glow.

Along the pathway of your backyard, you can install a solar light. To bring a romantic ambiance you can add some mounted lights up the trellis or the tree.

  1. Make Your Own Walkway

If the backward has no walkway, make one by yourself using stone, gravel or sand. You can mark the garden area, play area, pool area and deck using the trail.

  1. Invest in Your Deck

Decorate your deck using comfortable patio chairs, a table, and a storage box. Organize the furniture in such a way so that space looks spacious.

Lighting is an important factor that has a great impact on the beauty of your deck. You can install staring lights, string lights, under table light, recessed deck light, in-floor light, under rail deck light, lantern and much more lighting system in your backyard deck.

  1. Invest in Your Pool or Pond

Having a private swimming pool has so many benefits. Once you invest in your swimming pool you can enjoy the luxury of swimming whenever you need without paying.

You can also dig a pond and plant there different types of water plants like lotus, water lily, water lettuce, mosaic flower, blue iris, cardinal flower etc. You can also cultivate fish there.

  1. Invest in a Waterfall

Investing to make a waterfall in your garden makes the environment of the outdoor space tranquilized. Depending on your budget you have to choose the method and type of making a waterfall. There are both expensive and inexpensive methods for making an outdoor waterfall.

You need Rocks, Submersible pump, Tubing to run from pump to top of the waterfall, Large plastic flower pot (or similar) to house tubing, Rigid pond liner, Carpenter’s level, Shovel, Sand and Garden hose to make your own outdoor waterfall.

  1. Invest in Making a Gorgeous Swinging Bed

To take a nap in a breezy place or to spend some quality time with your partner a swinging bed in your backyard can be the best place. Only a few hundred dollars and a couple days are enough to complete this type of project of hanging a swinging bed in your backyard.

  1. Make an Outdoor Pizza Oven

Have you ever tasted real Neapolitan pizza? It is a wood-fired pizza that is backed at around 1000 degrees and only takes 90 seconds to cook. It is very delicious.

To beck Neapolitan pizza you can install a pizza oven in the outdoor space of your backyard.

Conclusion

If you want to do the entire upgrading task at once, it will be overwhelming and cost you pretty high at a time. If you do not have any problem with budget and can employ all the necessary manpower you can do it, otherwise, you can implement the upgrading ideas gradually.

A beautiful backyard is one of the best places to spend a good time with friends and family and not only that but also it helps to increase your level of creativity.